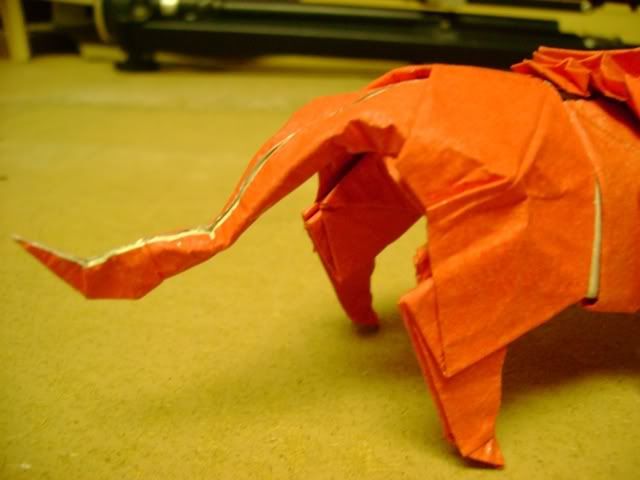
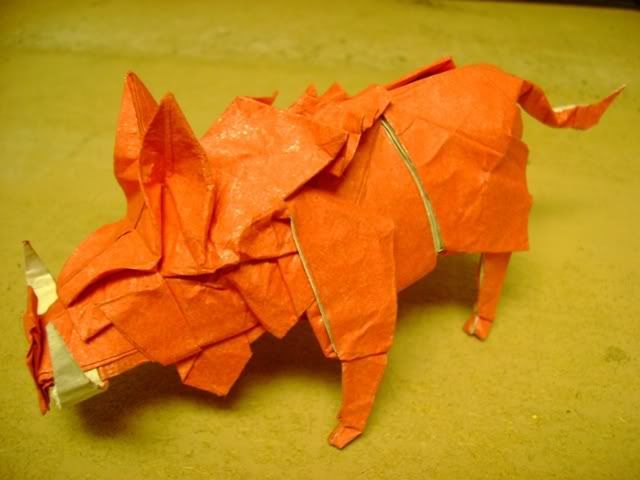
Diagrams for my Wild Boar

Need help with folding a model? Ask here.
zerobar
Junior Member
Posts: 59
Joined: April 8th, 2006, 8:34 am
Location: Lincoln, NE
Contact:

Diagrams for my Wild Boar

Post by zerobar »

I had a request for diagrams for my Wild Boar model, and had tried to make them with a computer program. Unfortunately, my computer is terrible, and couldn't run the program. So, I decided that I would make another model, taking pictures of every step, host them on a site, and give the directions and links to the pictures here.

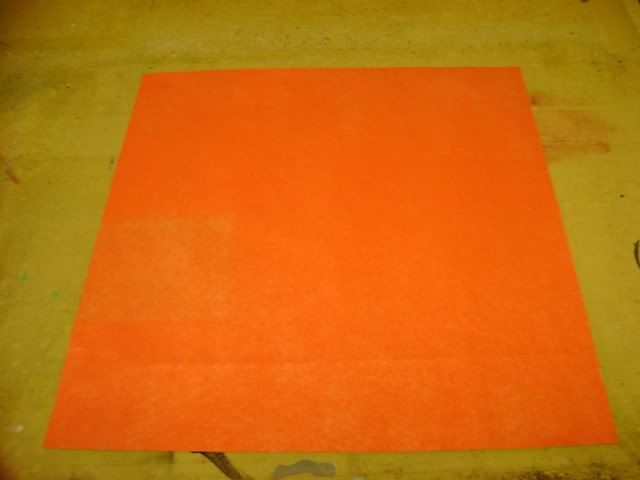
When making this model i suggest using either wetfolding or a foil backed paper, as it requires much shaping that is difficult using regular paper. the final model will end up being approximately 1/3 of the length of the side of paper, so take that into consideration when choosing paper size.

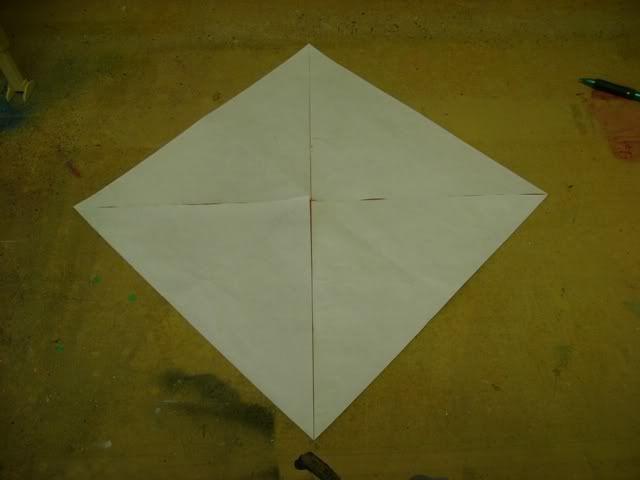
1.precrease the paper along diagonals.
Image

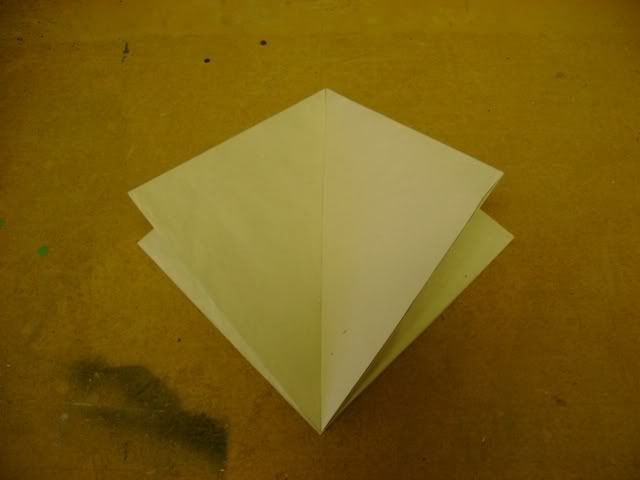
2.fold all corners to the center.
Image

3.perform a preliminary fold.
Image

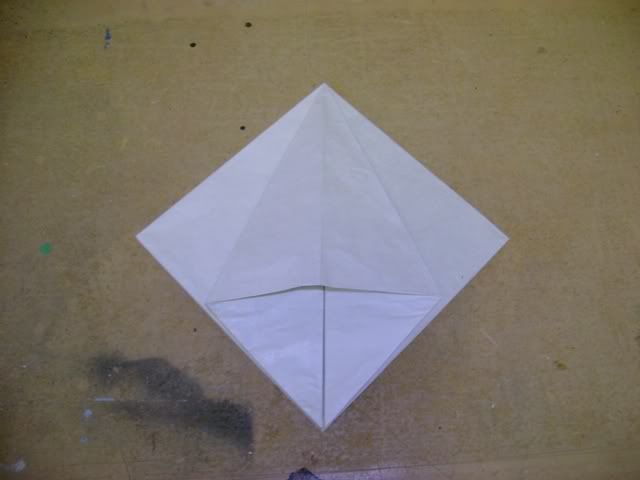
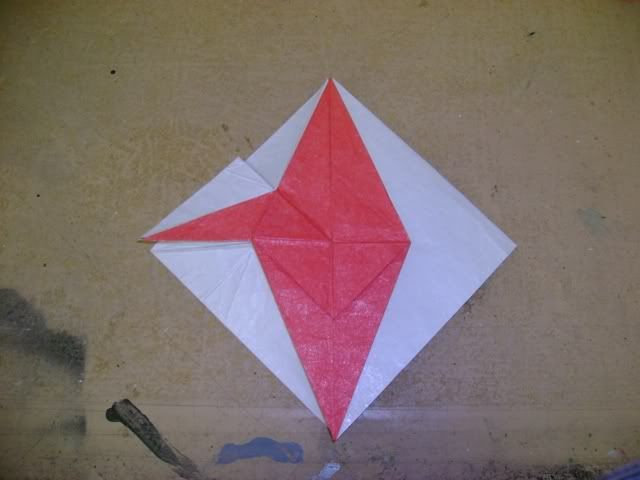
4. squash fold the flap on the left.
Image

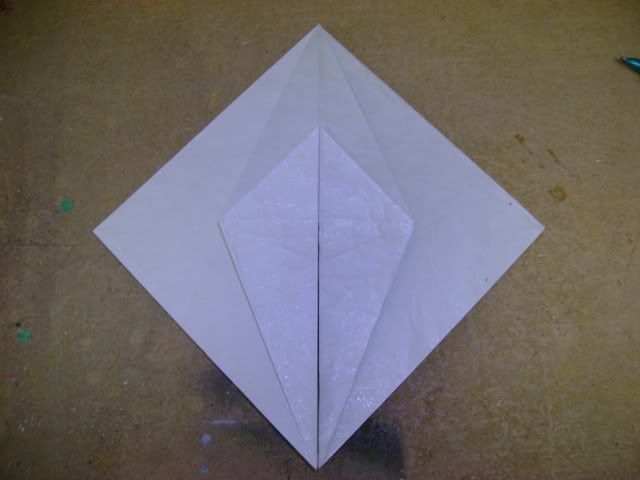
5. petal fold the flap.
Image

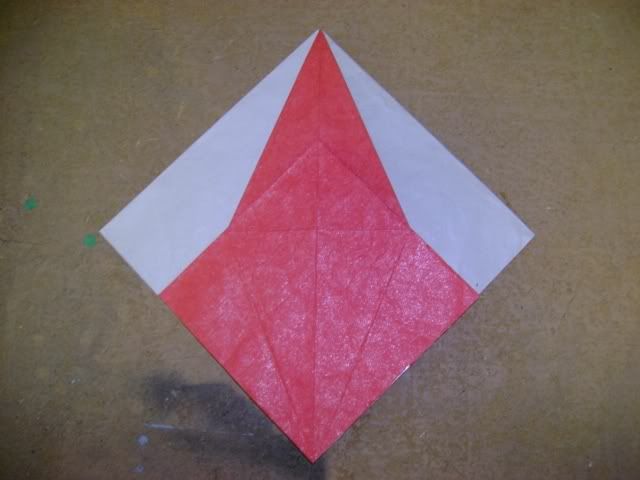
6. unwrap one layer.
Image

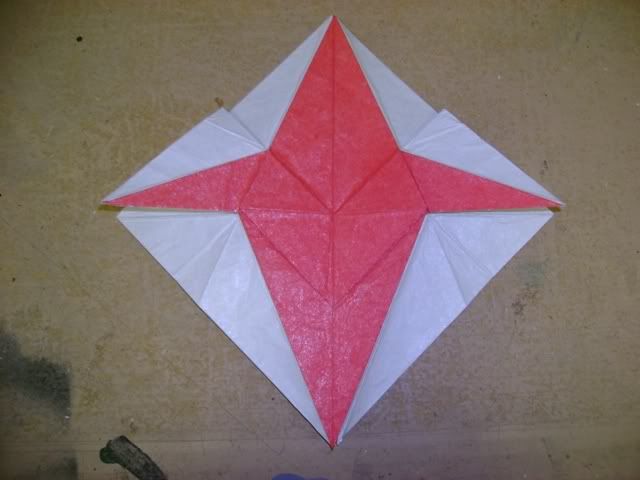
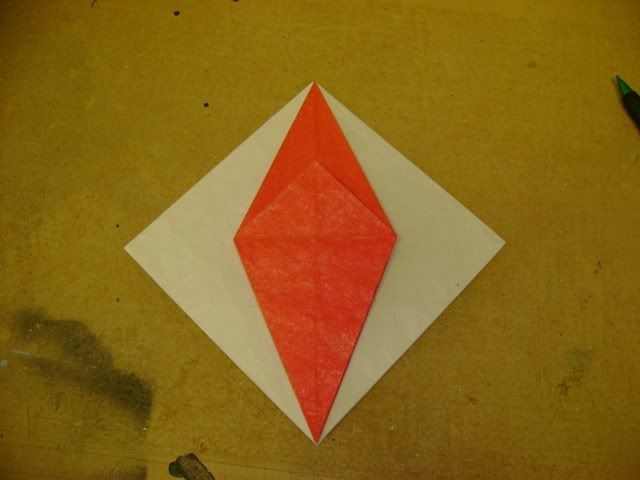
7.reverse fold the bottom flaps. repeat 4-7 behind.
Image

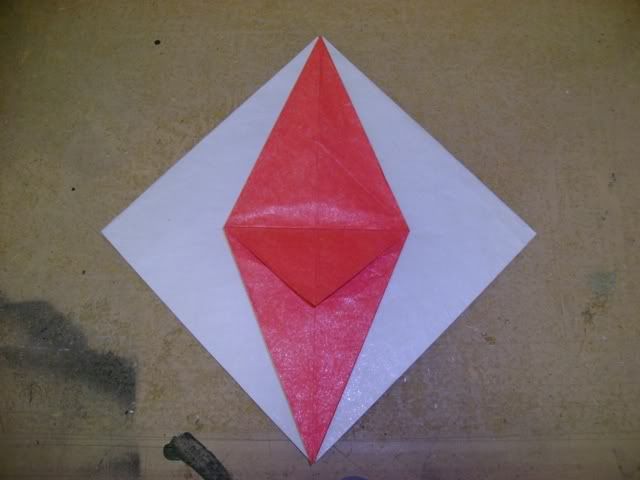
8. fold the small middle flap down.
Image

9. fold one flap over to the right.
Image

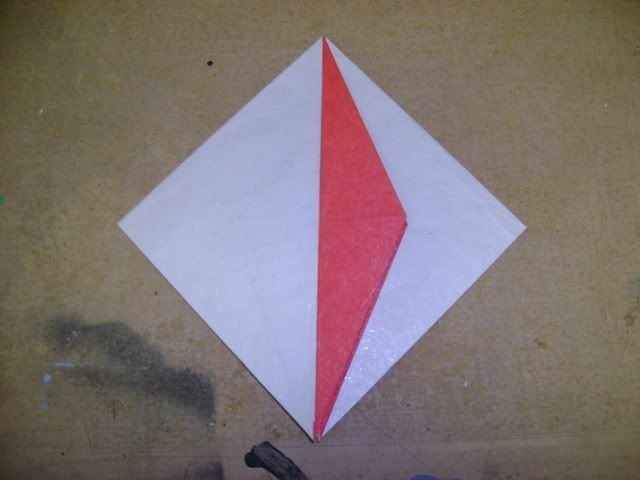
10. fold one flap up.
Image

11. fold two flaps back over to the left.
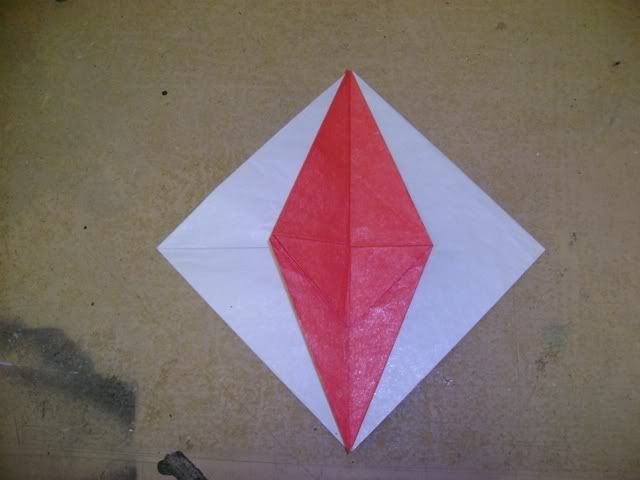
Image

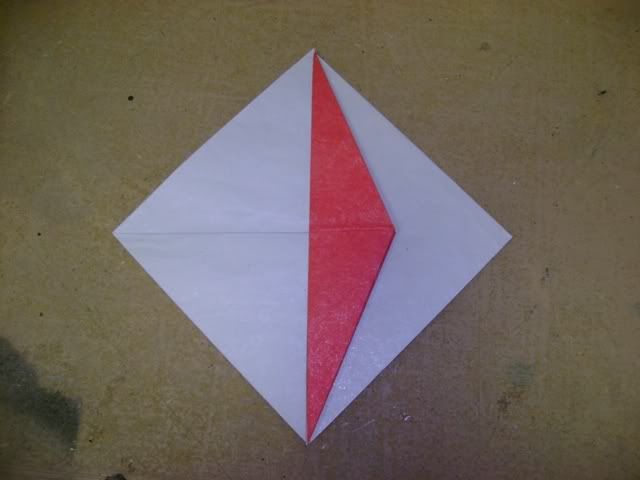
12. reverse fold the top flap to the left. flip over.
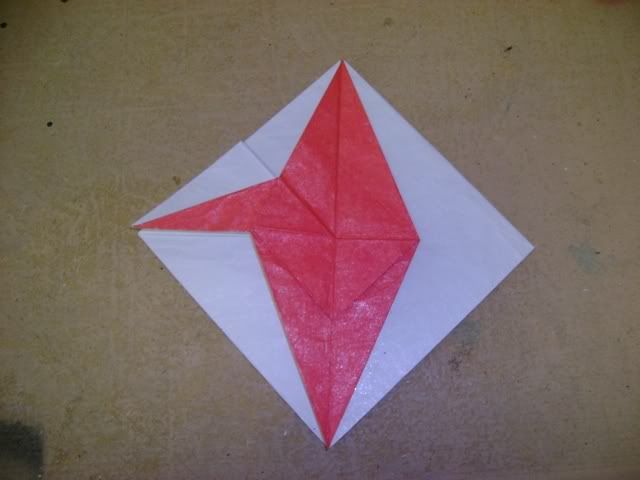
Image

13. fold two flaps from the right to the left.
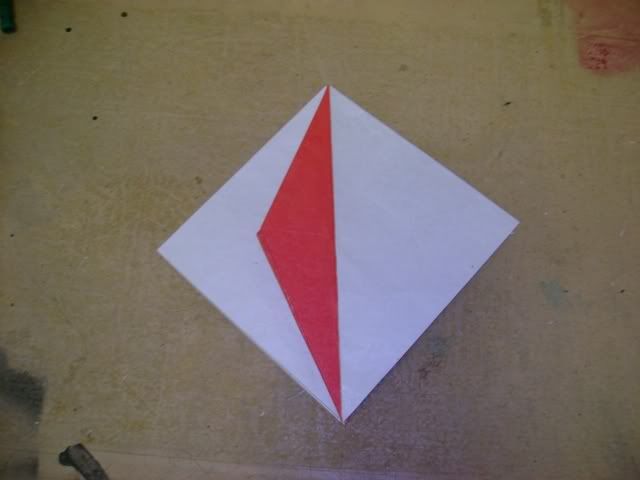
Image

14. fold one flap from the right to the center, simultaneously stretching the top of the flap behind it.
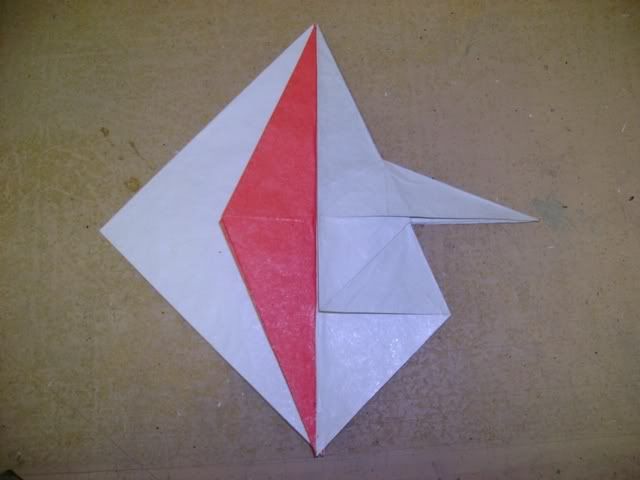
Image

15. reverse fold the bottom of the flap on the right.
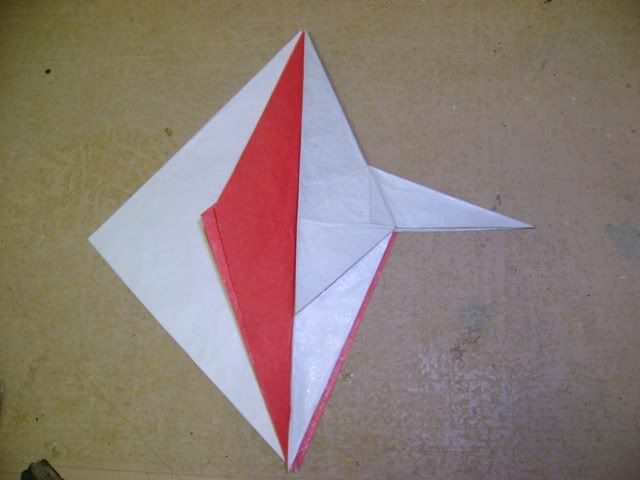
Image

16. squash fold the middle flap upwards.
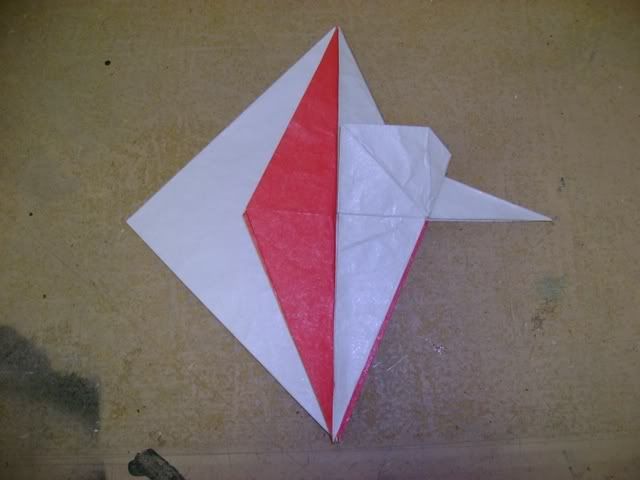
Image

17.unfold back to step 11.
Image

18. repeat on the right.
Image

19. partially unwrap one layer from the left.
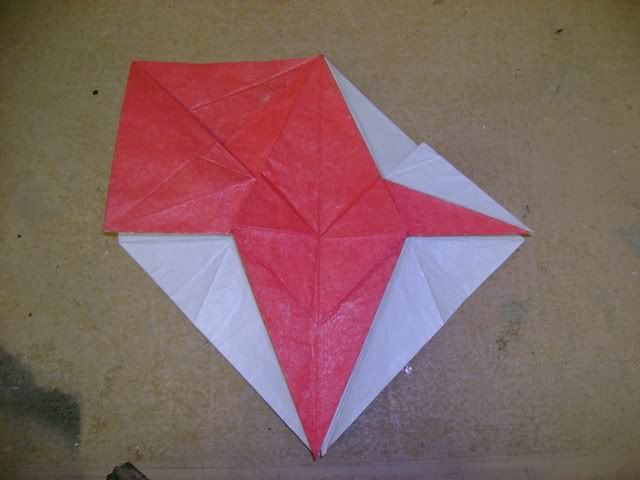
Image

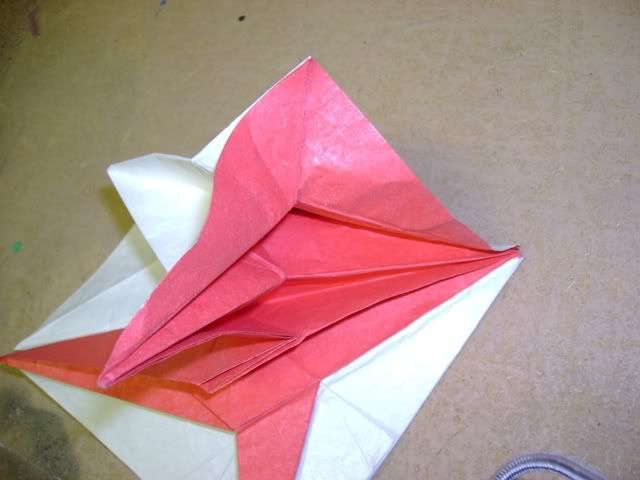
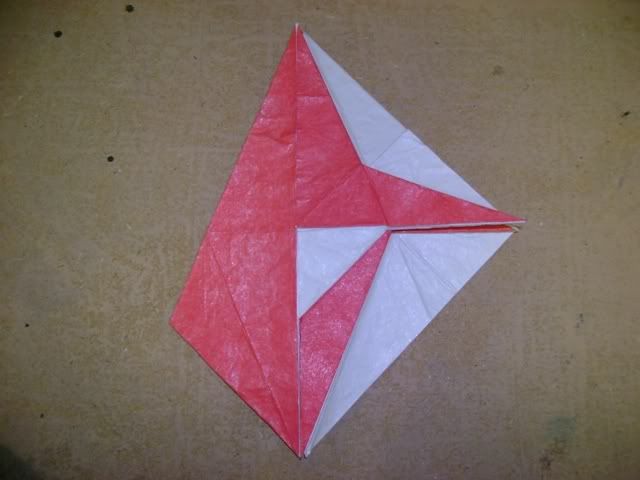
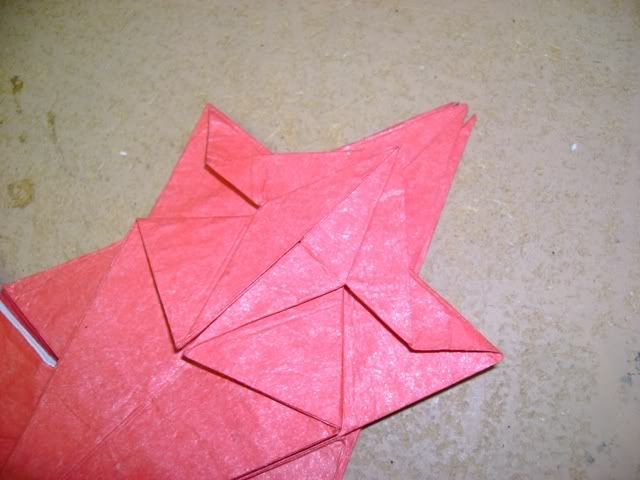
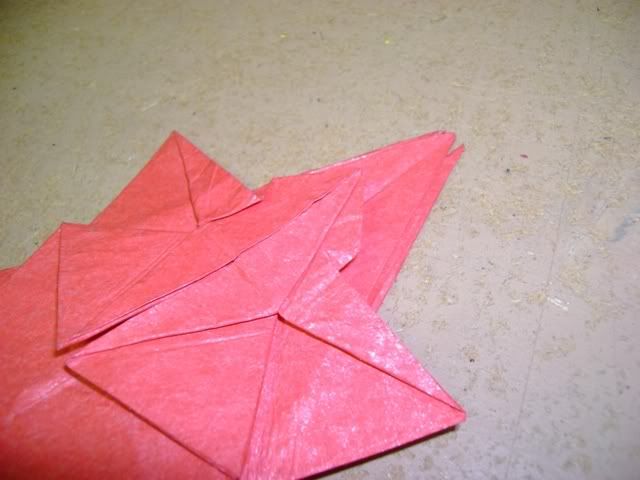
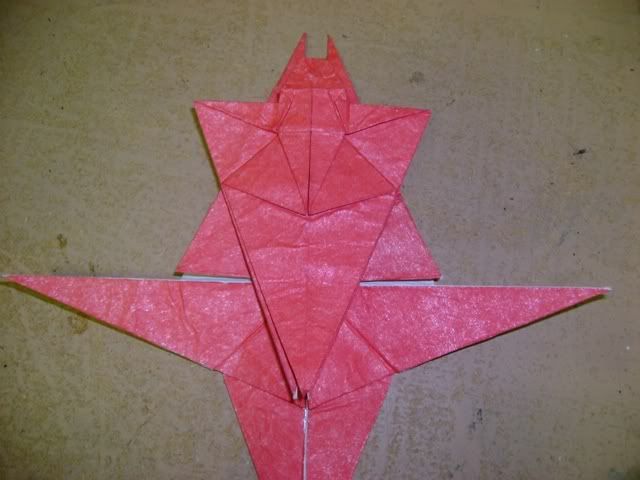
20. squash fold the large pocket underneath. while doing so, follow the existing creases to collapse the thin red flap.
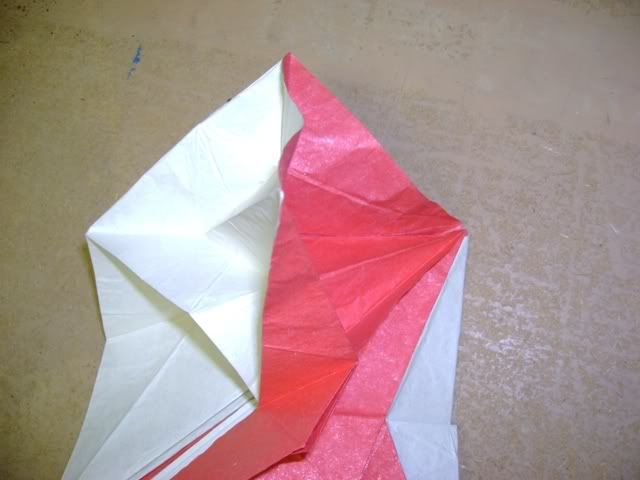
Image
Image
Image

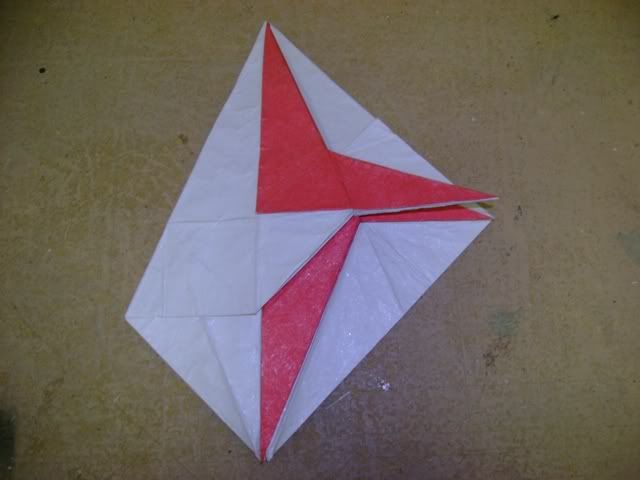
21. unwrap one layer on the left.
Image

22. closed sink the bottom of the flap on the left along existing creases.
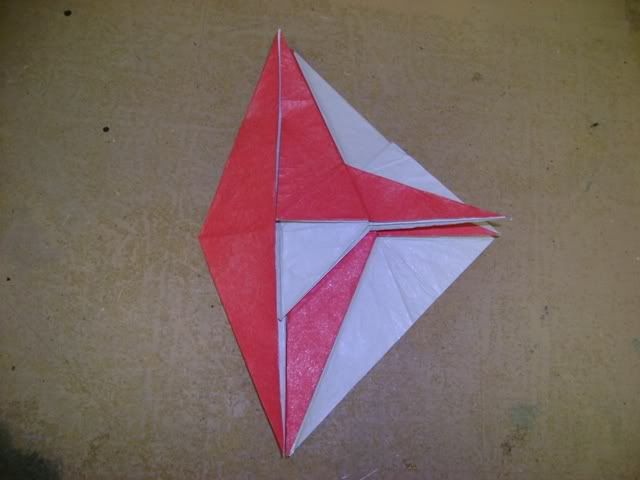
Image

23. sink the central white flap upwards (closed on the left, open on the right) so it appears like a waterbomb base when viewed from above.
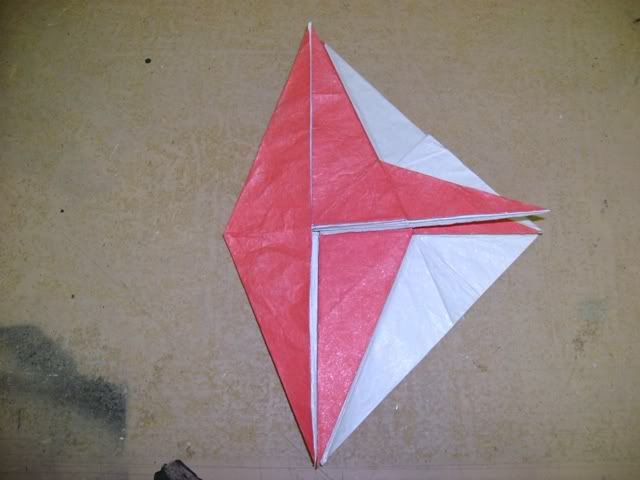
Image

24. free some paper near where you just sank the corner upwards.
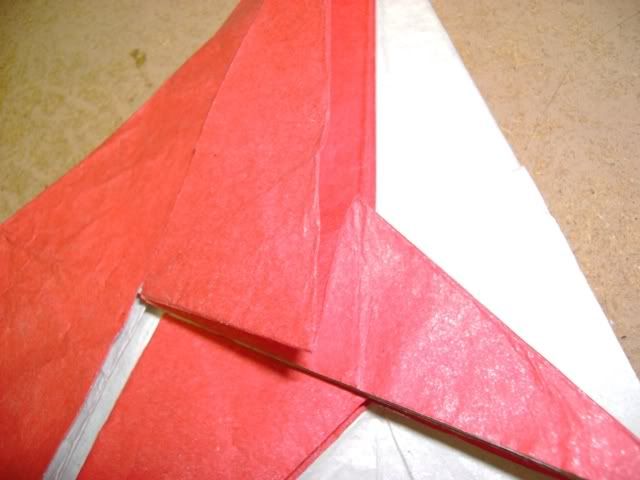
Image

25.fold the entire assembly to the left.
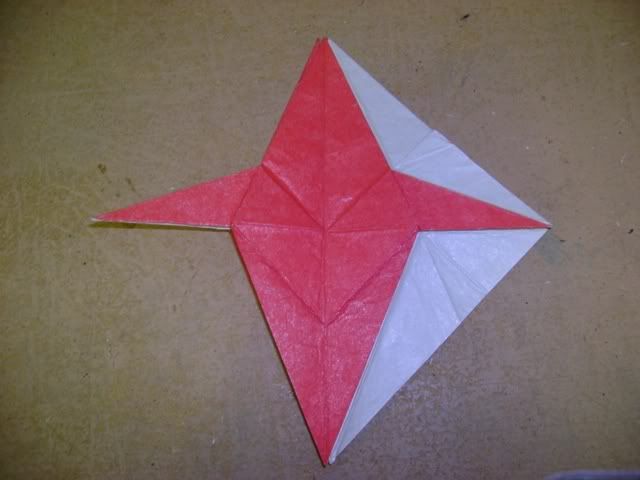
Image

26. repeat 19-15 on the right.
Image

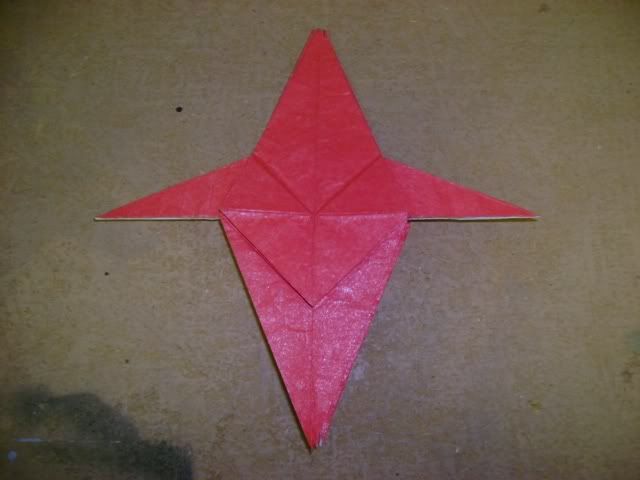
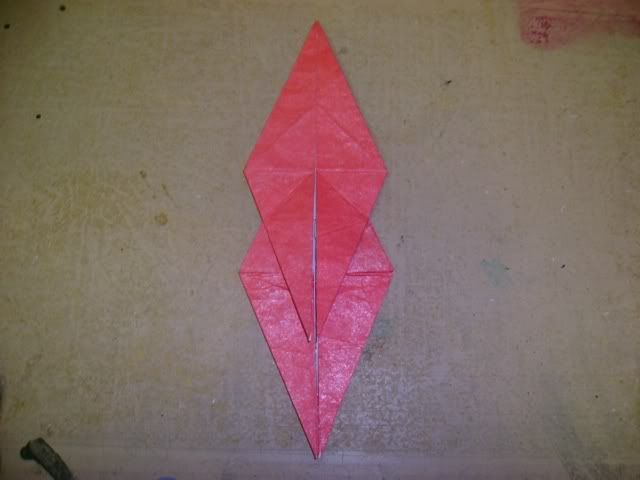
27. stretch the single flap upwards, pulling the outside flaps to the center.
Image

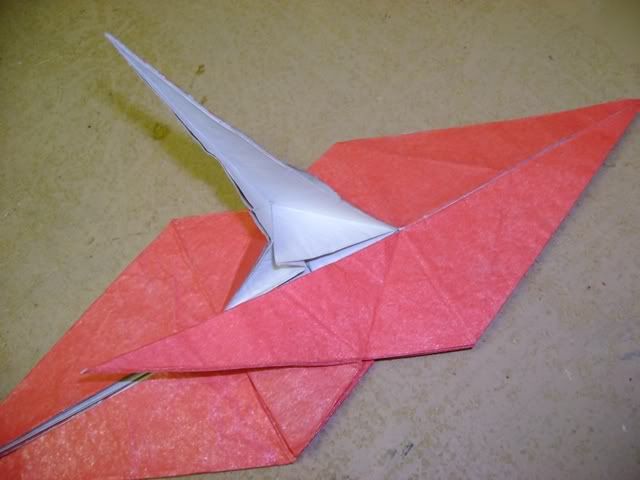
28. free the small flap in the middle of the top flaps and press flat. repeat on the right. flip over.
Image

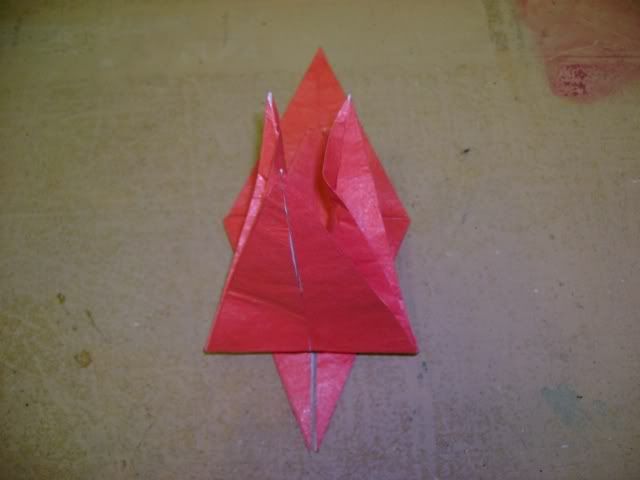
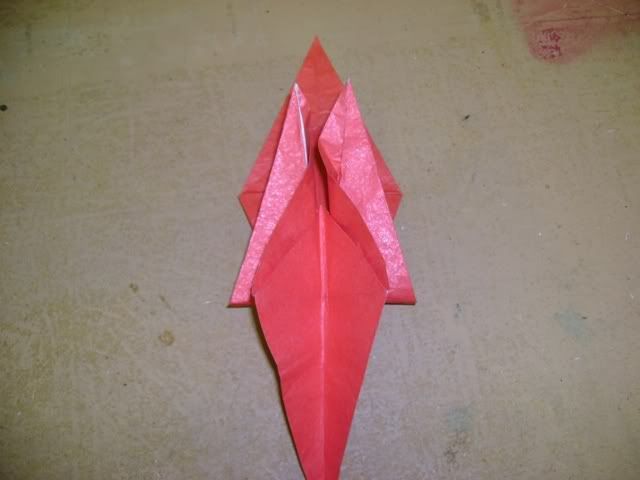
29.reverse fold the two thin bottom flaps upwards, through the point that looks like a waterbomb base. DO NOT PRESS FLAT.
Image

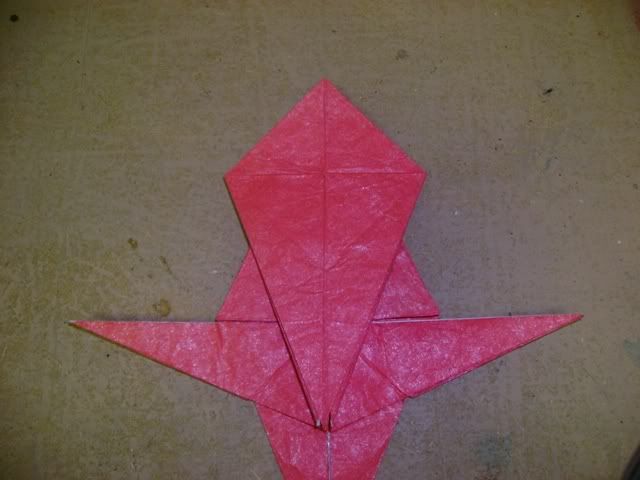
30. fold the bottom flap up.
Image

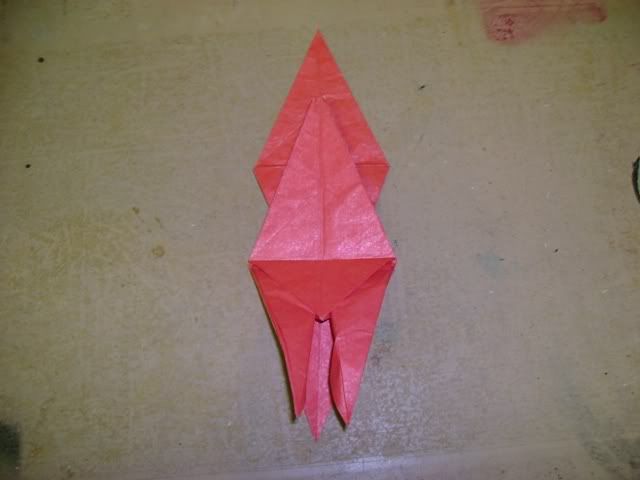
31. fold all three flaps down. flip over.
Image

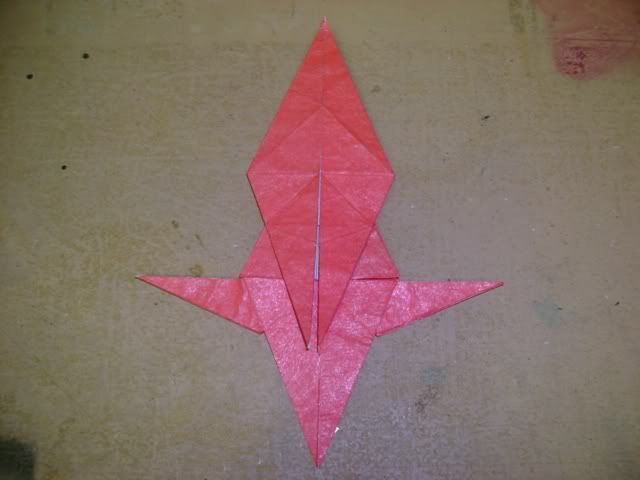
32.reverse fold the two thin flaps to the side. press flat.
Image

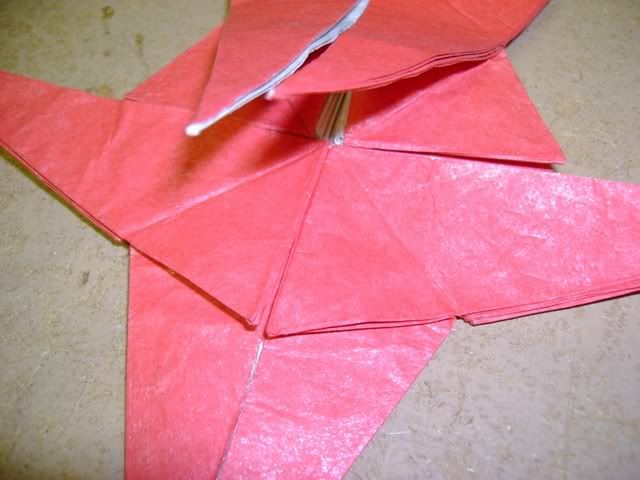
33.fold the two small flaps, above the flaps you just folded down.
Image

34. fold the top flap down.
Image

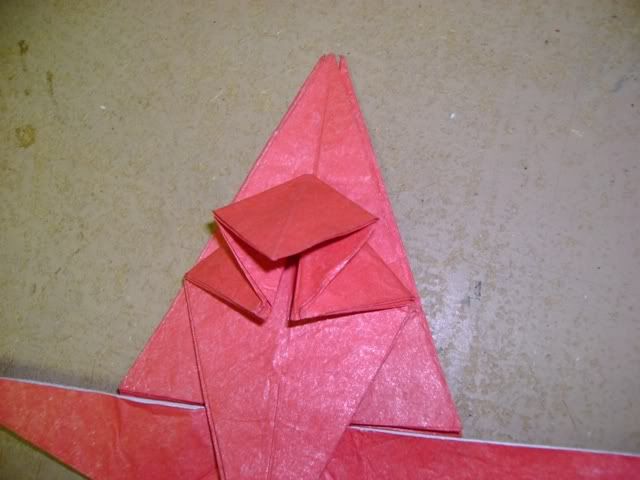
35. fold the top point as though you were folding a waterbomb base.
Image

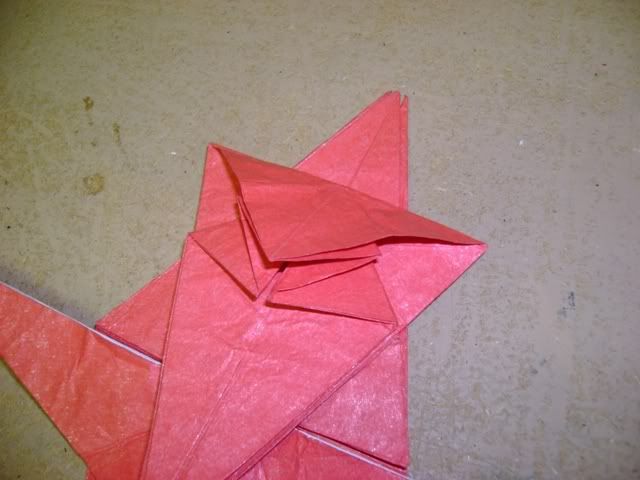
36. pull out one layer on either side of the last fold.
Image

37. petal fold the flap upwards.
Image

38. swivel fold the sides part way.
Image

39. fold the tip under where it meets the swivel fold.
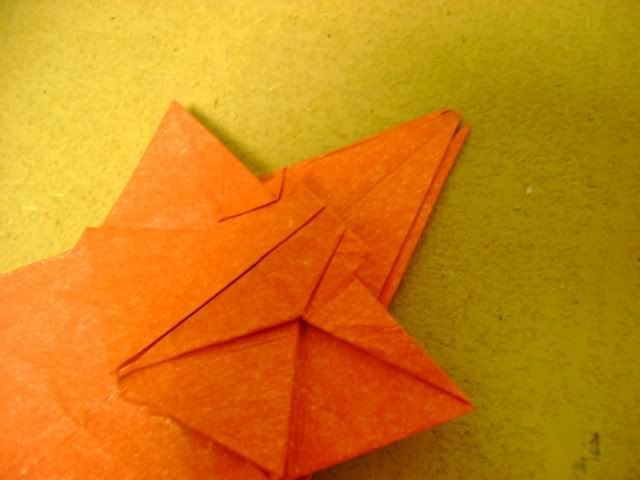
Image

40. fold the thick tip about 1/4 of the way to the edge you just made. (mine's a little too far in the picture). it may help to reverse fold the other two points backward. crease and unfold.
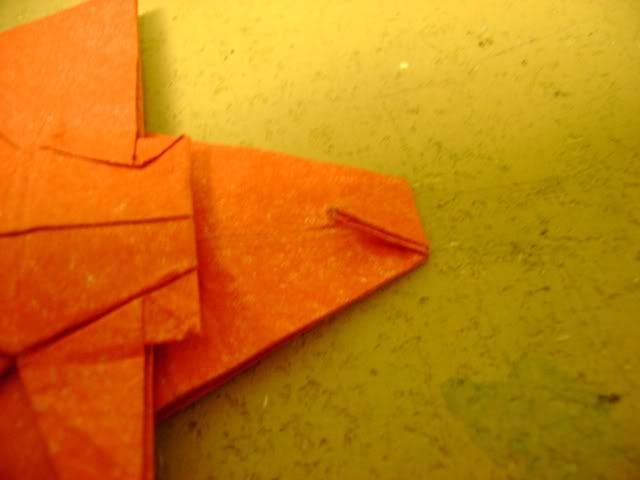
Image

41. open sink the tip along the creases you just made.
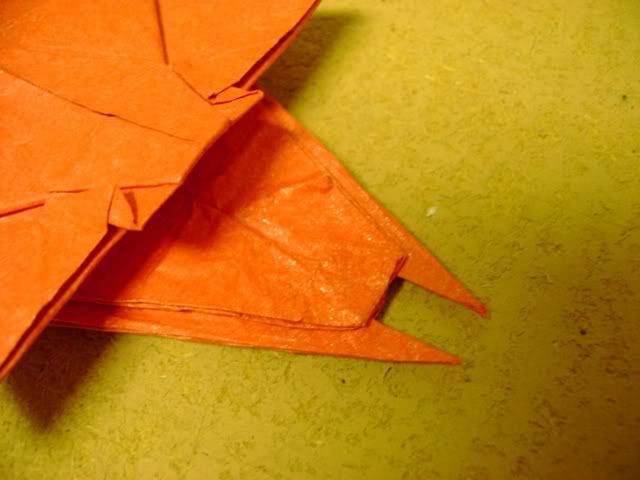
Image

42. fold the two side points back down, but don't press flat. open the side slightly.
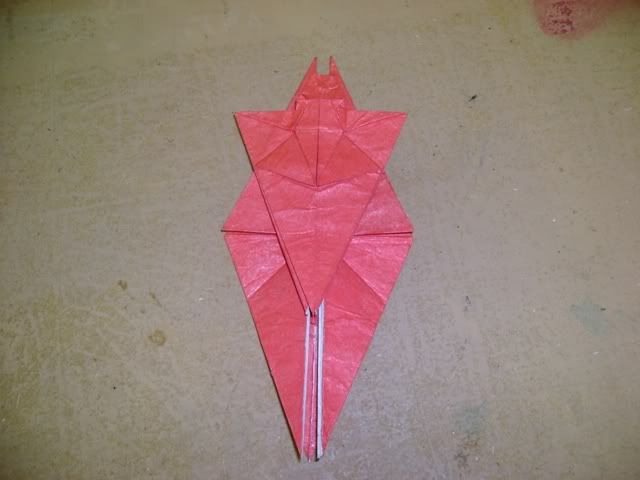
Image

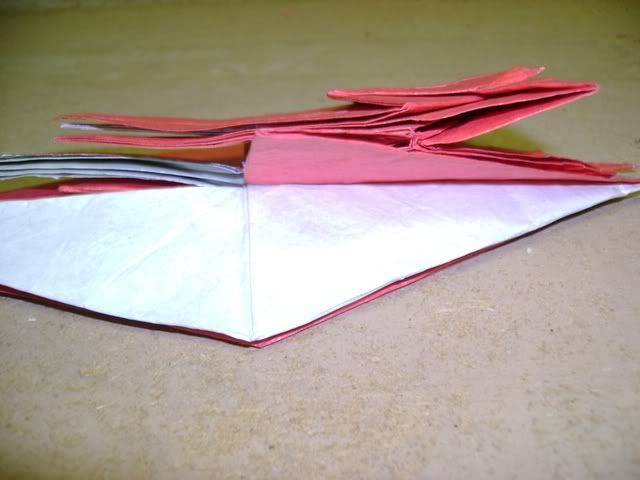
43. wrap one layer behind, to expose the white side of paper. this should be the long side of the flap which forms one of the two points at the top.
Image

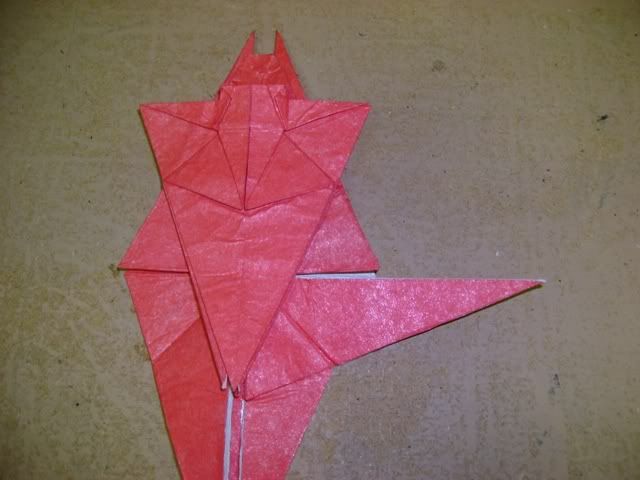
44. fold the thin bottom point back up.
Image

45. repeat 43-44 on the left.
Image

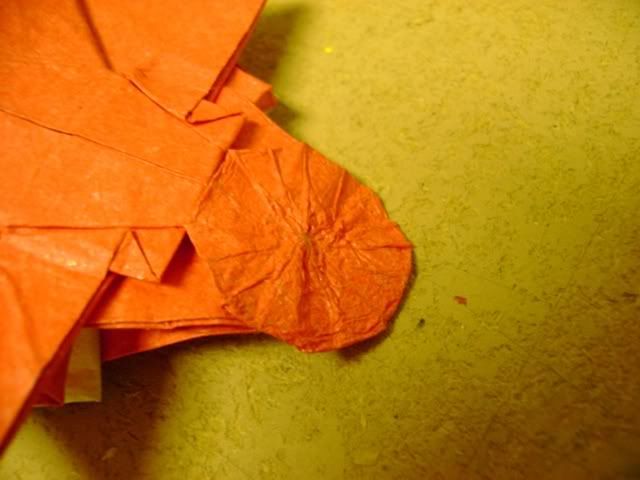
46. open the tip you sank in step 41. You will need to move the two thin points to accomplish this. fold the top and bottom edge back slightly.
Image

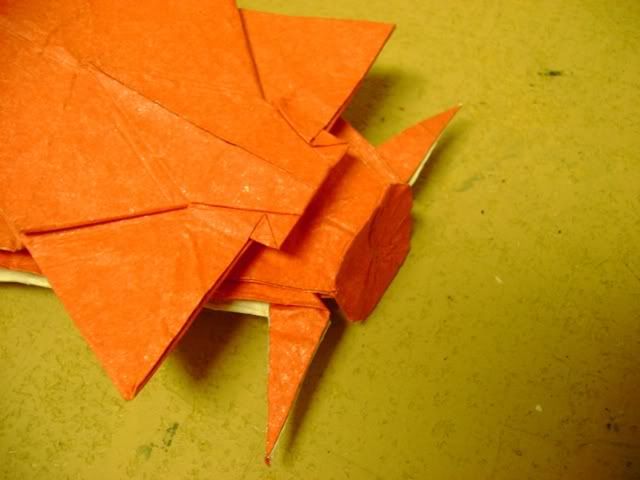
47. reverse fold the two thin points to the side.
Image

48. tuck the top edge into the pocket behind it. repeat on the other side.
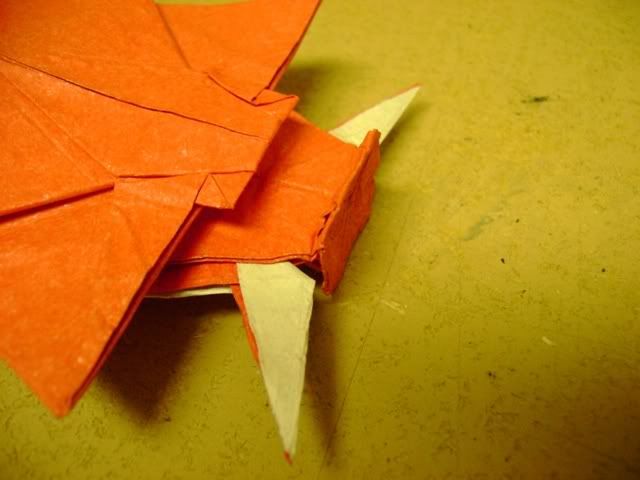
Image

49. reverse fold the two thin points in the center to the outside, as far as they can go. make sure layers are distributed evenly.
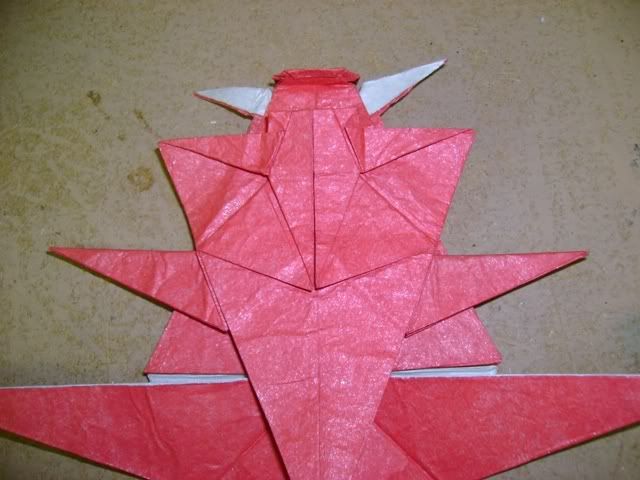
Image

50. reverse fold the top edge inward. repeat on the other side.
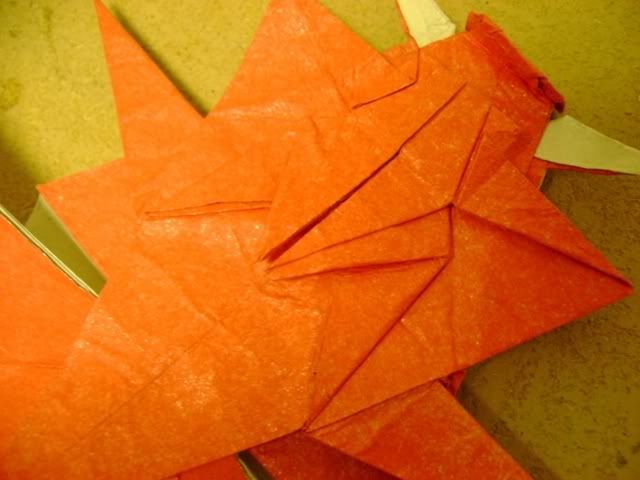
Image

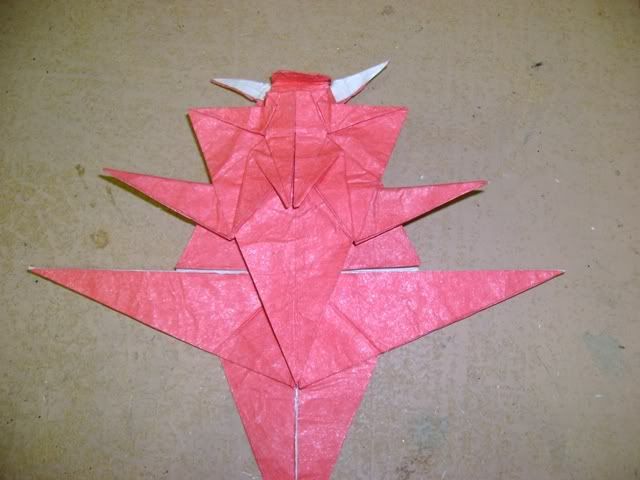
51. pull the white layer of the long side flaps out.
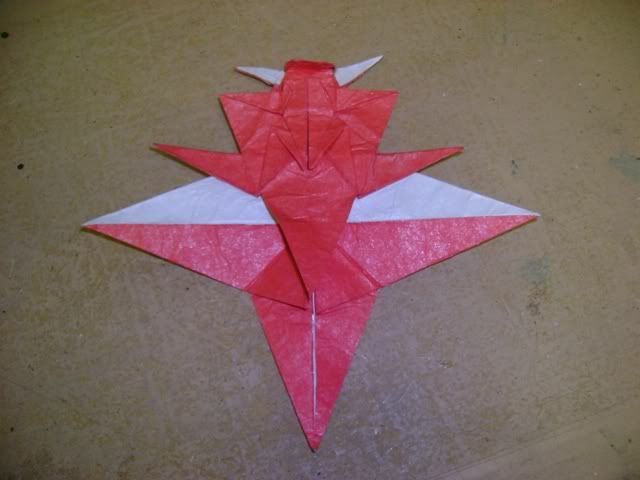
Image

52. tuck the white flap into the bottom most layer of the long flaps.
Image

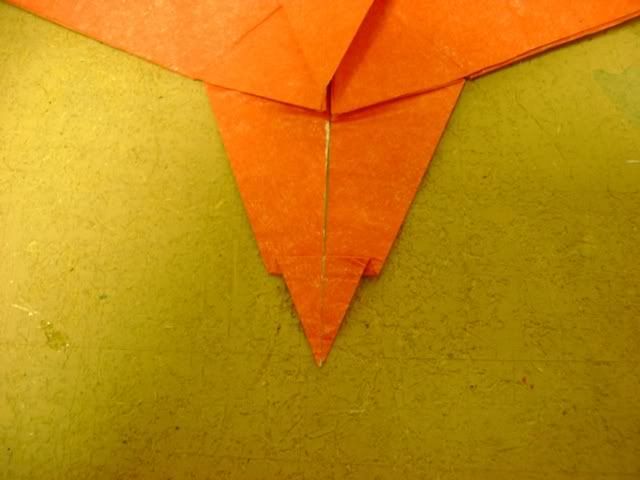
53. pleat the tip of the bottom flap slightly. flip over.
Image

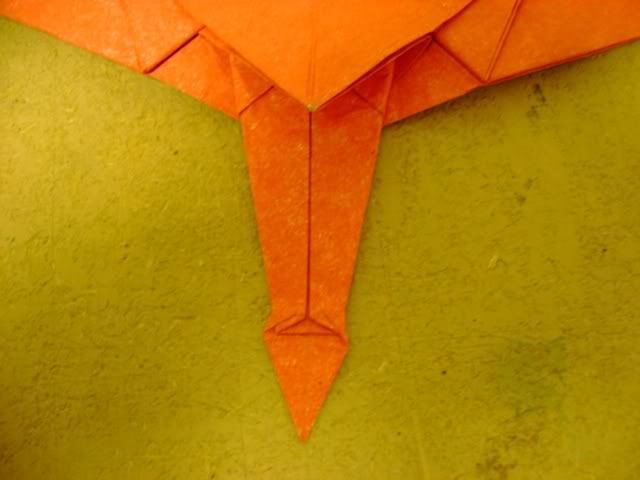
54. fold the edges of the bottom flap towards the center, forming a small gusset at the pleat.
Image

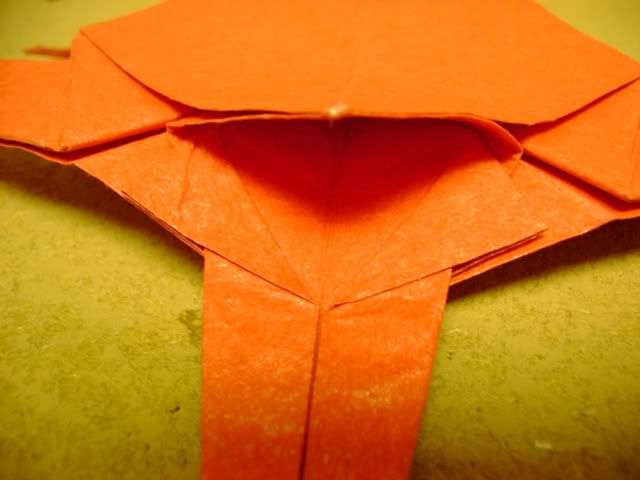
55. swivel fold the paper at the base of the tail. flip over.
Image

56. tuck the wide corners behind. flip over.
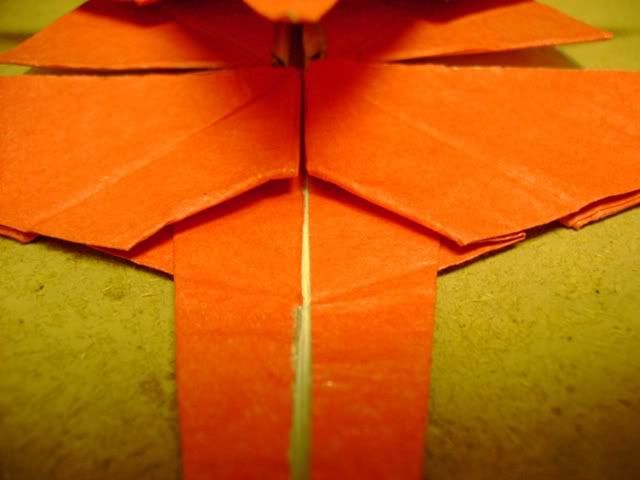
Image

57. fold all edges on the side in, on the same crease, to thin the body. (crease starts at the back of the front leg and ends at the back of the back leg.)
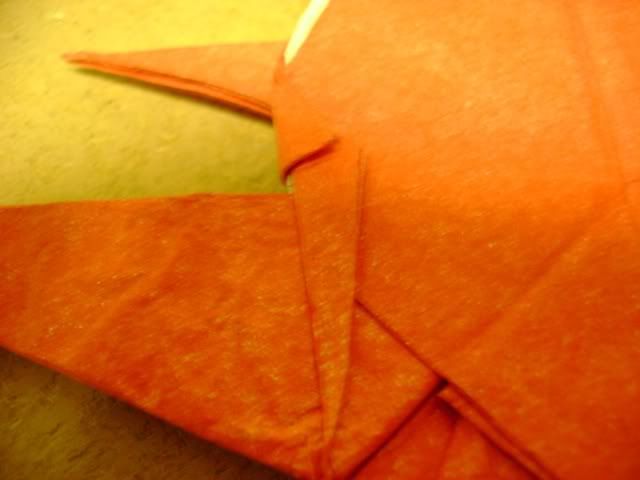
Image

58. pleat the wide point at the top around the edge. repeat on the other side.
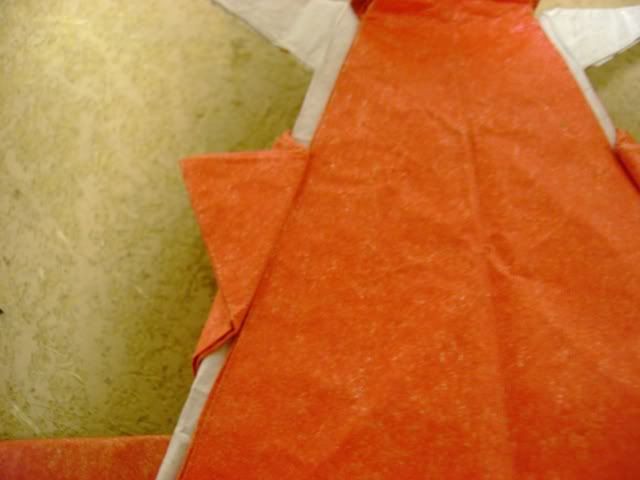
Image

59. swivel fold the bottom of the wide flaps.
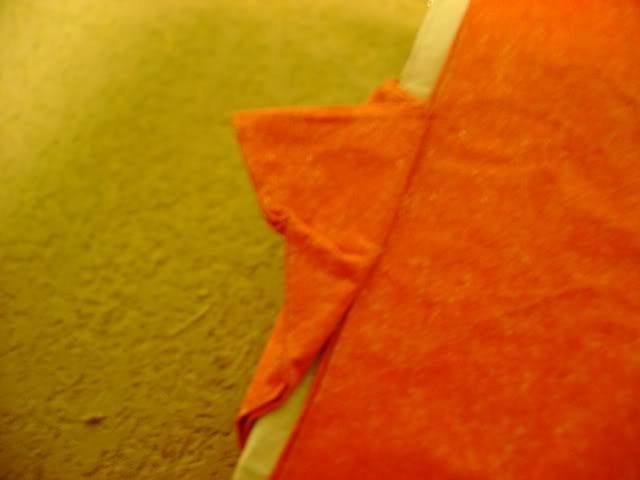
Image

60. flip over. widen the top of the wide point.
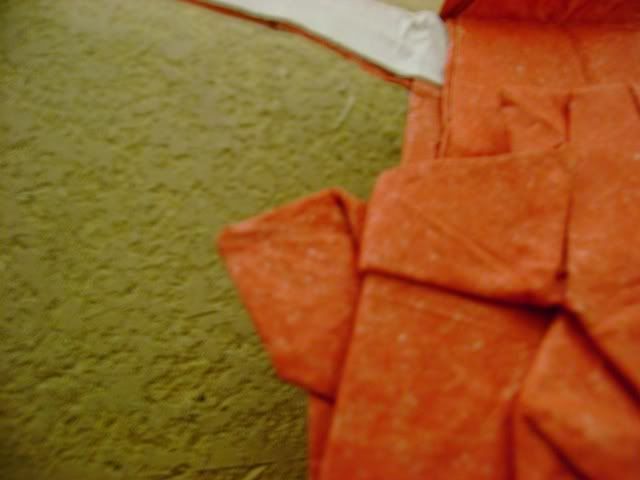
Image

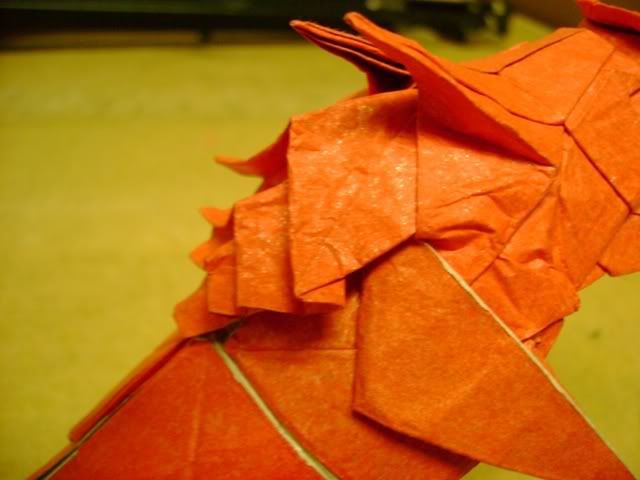
61. round the body. Be careful, the paper is very thick and should be gently curved.
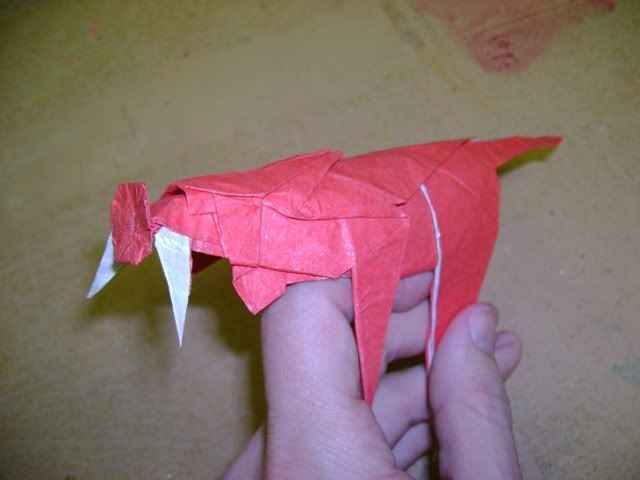
Image

62. crimp the head down and the nose slightly up.
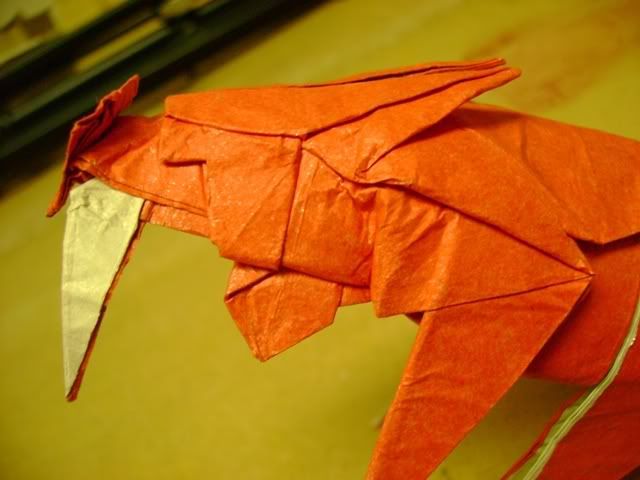
Image

63. simultaneously pull the top layer up and tuck two layers from the front leg into the pocket behind them. The model WILL NOT LIE FLAT. repeat on the other side.
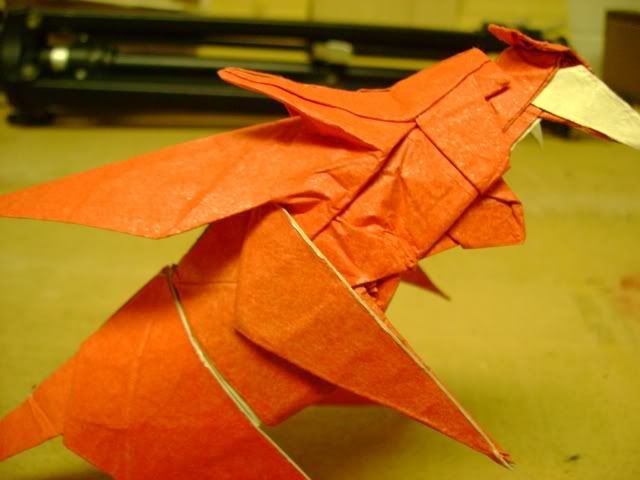
Image

64. crimp and shape the mane.
Image

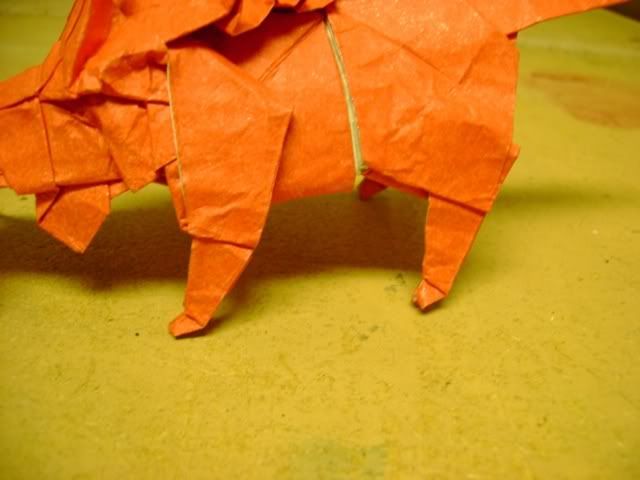
65. reverse fold the legs in and out and shape the hooves.
Image

66. shape the rear and tail.
Image

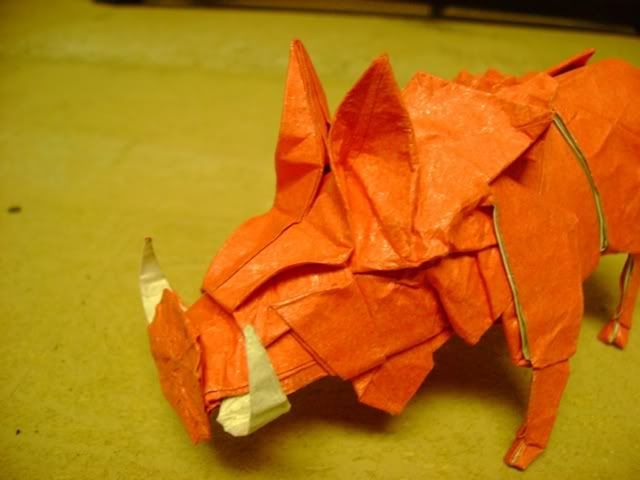
67. open the eyes and ears and curve the tusks.
Image

68. finished Wild Boar
Image
Last edited by zerobar on March 6th, 2007, 8:58 pm, edited 1 time in total.
TheRealChris
Moderator
Posts: 1874
Joined: May 17th, 2003, 1:01 pm
Location: Germany

Post by TheRealChris »

I modified your posting to make one out of it, and deleted the other ones. I also made the pictures visible.
I saved the original format (with the pictures as clickable links), so if somebody thinks it's too much with alle the pictures, I can redo the old entry.
User avatar
Ondrej.Cibulka
Buddha
Posts: 1055
Joined: January 9th, 2006, 4:18 pm
Location: Czech republic
Contact:

Post by Ondrej.Cibulka »

Great work. Magnificent!
Ondrej Cibulka Origami, www.origamido.cz
User avatar
Cupcake
Buddha
Posts: 1989
Joined: July 1st, 2006, 1:59 pm
Location: Canada
Contact:

Post by Cupcake »

Very very nice model! :D
Ryan MacDonell
My Designs
User avatar
xaoslord
Junior Member
Posts: 90
Joined: January 12th, 2007, 8:41 pm
Location: Grayson, Kentucky

Post by xaoslord »

Great job! I hope to fold this soon! =D>
-Ray My Flickr Album
"We are dreamers, shapers, singers, and makers." -Elric
User avatar
origami_8
Administrator
Posts: 4371
Joined: November 8th, 2004, 12:02 am
Location: Austria
Contact:

Post by origami_8 »

Very nice model and clear pictures :D
zerobar
Junior Member
Posts: 59
Joined: April 8th, 2006, 8:34 am
Location: Lincoln, NE
Contact:

Post by zerobar »

Thanks, everyone. I'm hoping these pictures work well enough, to guide people through it. If anyone has any problems, feel free to post them here, so that everyone knows if there are any mistakes. I'm looking forward to seeing some other interpretations of the model. Feel free to post pictures of YOUR models here.
User avatar
Cupcake
Buddha
Posts: 1989
Joined: July 1st, 2006, 1:59 pm
Location: Canada
Contact:

Post by Cupcake »

It's coming along... I have to save the picture so that I don't lose them all, first. :D
Ryan MacDonell
My Designs
TheRealChris
Moderator
Posts: 1874
Joined: May 17th, 2003, 1:01 pm
Location: Germany

Post by TheRealChris »

oh sorry, I forgott to tell you, that I LOVE that model. its a fantastic design... very good work =D>
User avatar
spawn7il
Junior Member
Posts: 58
Joined: July 28th, 2005, 5:54 pm
Location: israel

hi

Post by spawn7il »

it is a beautiful work, clean folds...
I Love Origami
User avatar
Rdude
Senior Member
Posts: 292
Joined: August 31st, 2005, 5:50 am

Post by Rdude »

Nice job on the boar diagrams, they are very clear pictures, i will have to try to fold it soon.

Rdude
If you can't fold it, try a bazooka.
My Flickr ->
http://www.flickr.com/photos/rdudevr55/
zerobar
Junior Member
Posts: 59
Joined: April 8th, 2006, 8:34 am
Location: Lincoln, NE
Contact:

Post by zerobar »

Once again, thanks everyone. I'm glad to know it's enjoyed. Honestly, I think the one in the diagrams is not the best. I started the pleats on the mane a little far back and the nose is too big (so take that into account if you attempt it :wink: ). I looked around on the internet today, and i really didn't see any good designs for western style boars (there are some very good Japanese ones, however :D). So I'm happy to know that, at least for a while, I have one of the better western boars out there (at least until Satoshi Kamiya decides to make one :lol: ).
Watusa
Junior Member
Posts: 64
Joined: February 21st, 2007, 12:38 pm
Location: London, UK

Post by Watusa »

definitely. you've imparted a great amount of character into it :)
User avatar
Cupcake
Buddha
Posts: 1989
Joined: July 1st, 2006, 1:59 pm
Location: Canada
Contact:

Post by Cupcake »

With all these designs you've been making, you'll need to write a diagram book! :D
Ryan MacDonell
My Designs
zerobar
Junior Member
Posts: 59
Joined: April 8th, 2006, 8:34 am
Location: Lincoln, NE
Contact:

Post by zerobar »

Actually, Ondrej asked me if he could diagram it on his computer and publish it in a book he's planning on releasing. I'm very excited about it. Maybe one day, I can publish a book of my own, but right now I don't think I have enough publishable designs to merit it. Maybe if I try and work out some new material. :)
Post Reply