Diagrams for my Wild Boar
Posted: February 28th, 2007, 4:23 am
I had a request for diagrams for my Wild Boar model, and had tried to make them with a computer program. Unfortunately, my computer is terrible, and couldn't run the program. So, I decided that I would make another model, taking pictures of every step, host them on a site, and give the directions and links to the pictures here.
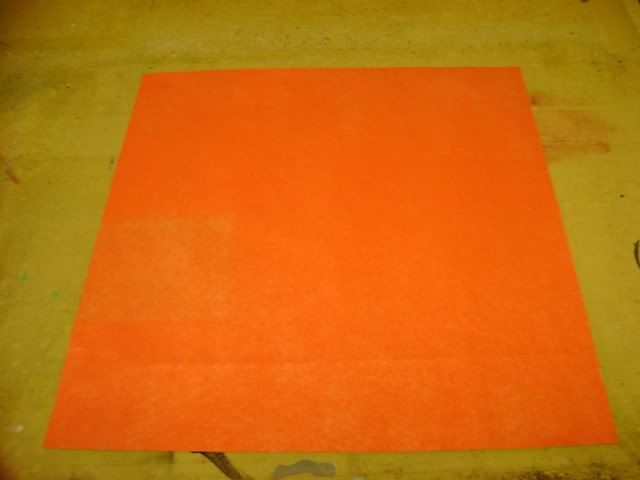
When making this model i suggest using either wetfolding or a foil backed paper, as it requires much shaping that is difficult using regular paper. the final model will end up being approximately 1/3 of the length of the side of paper, so take that into consideration when choosing paper size.
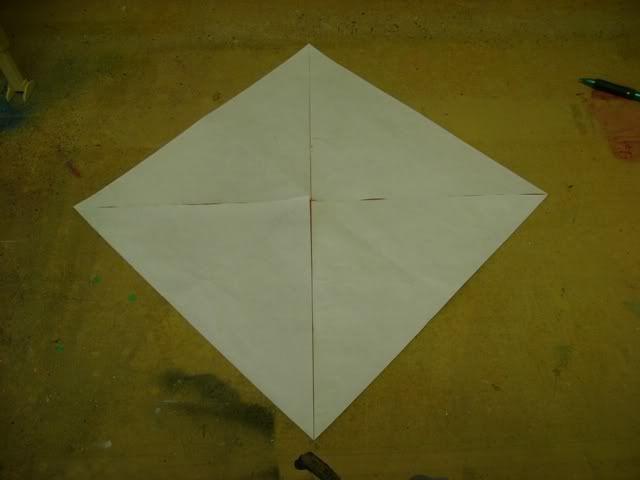
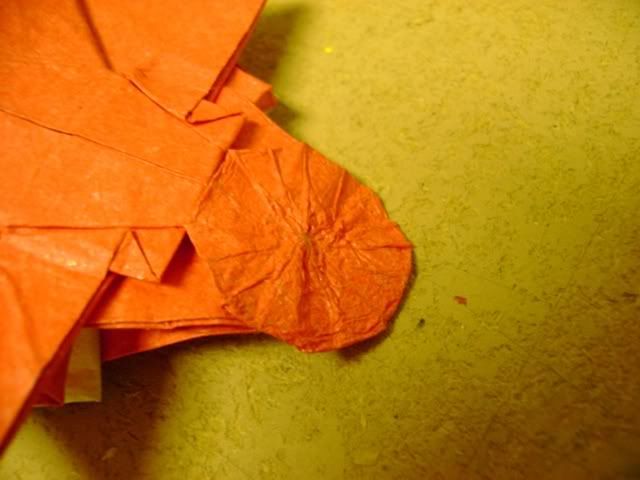
1.precrease the paper along diagonals.
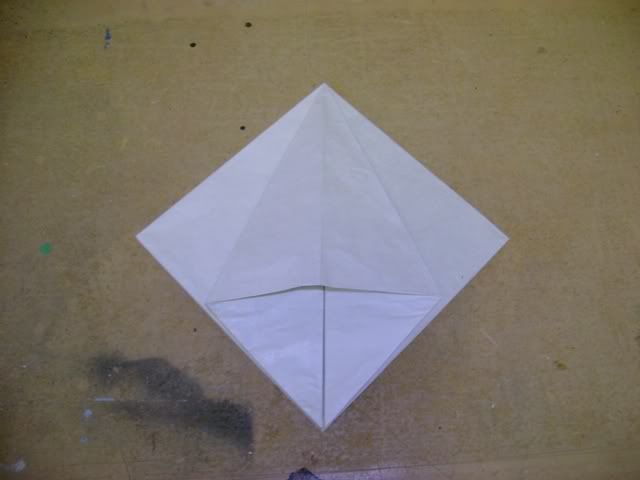
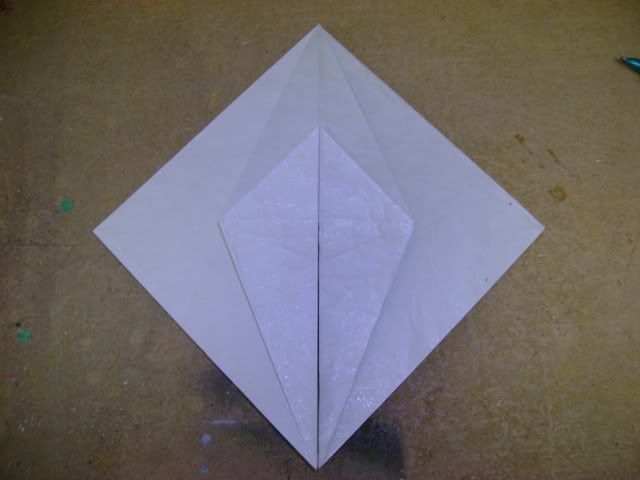
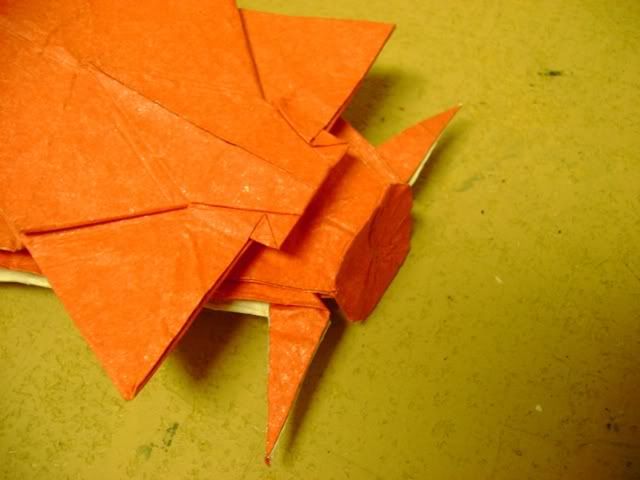
2.fold all corners to the center.
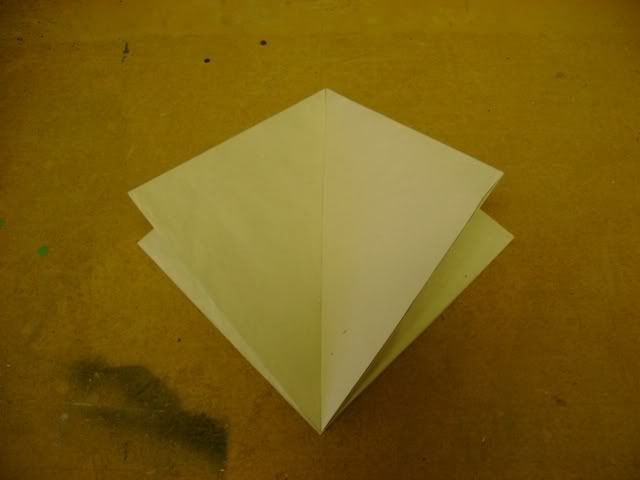
3.perform a preliminary fold.
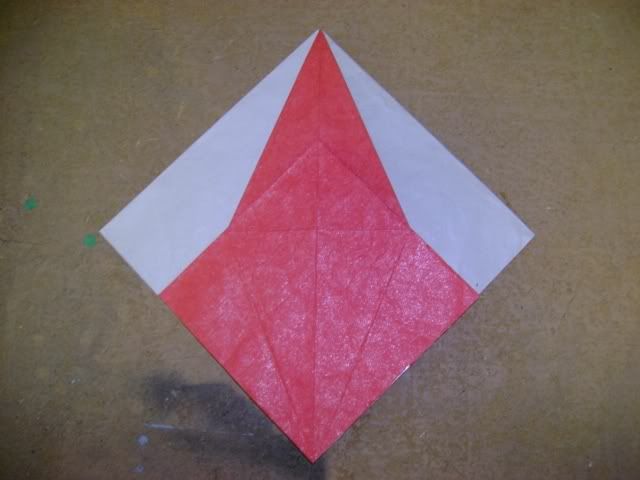
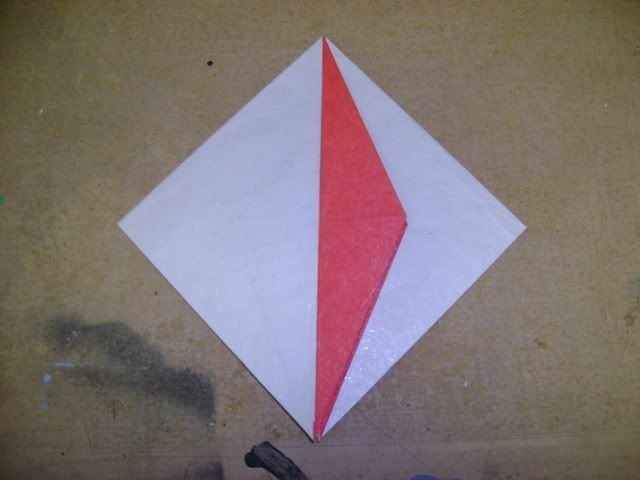
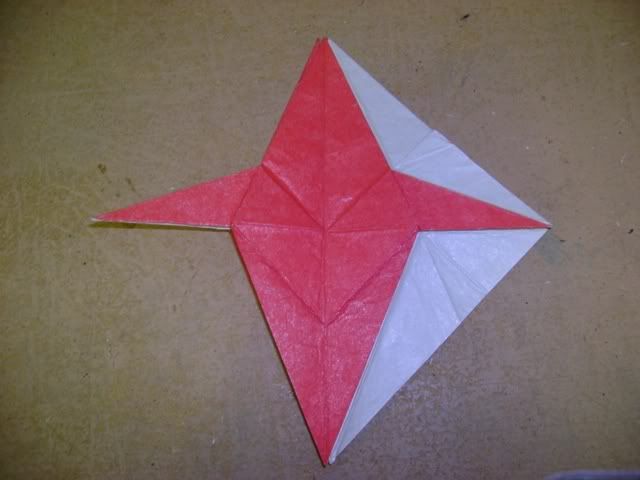
4. squash fold the flap on the left.
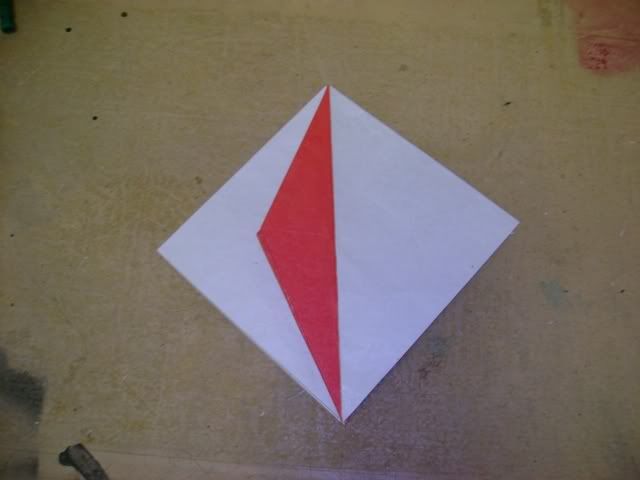
5. petal fold the flap.
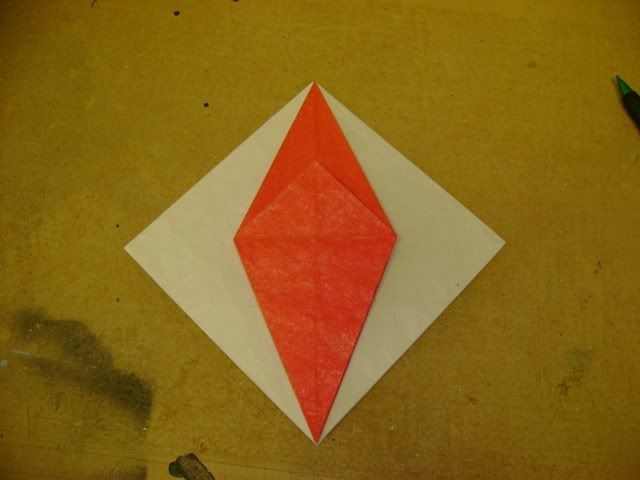
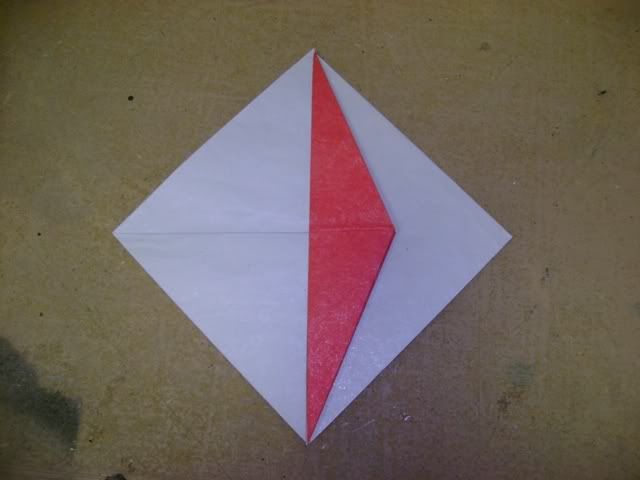
6. unwrap one layer.
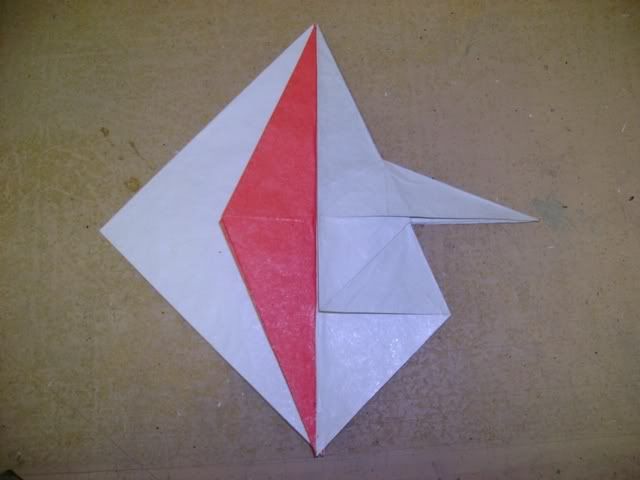
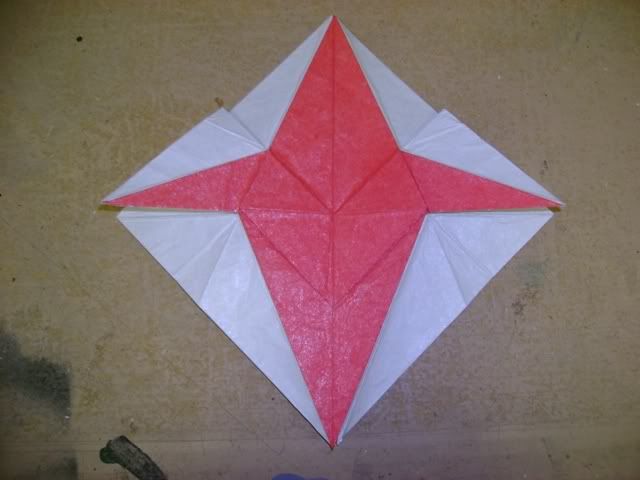
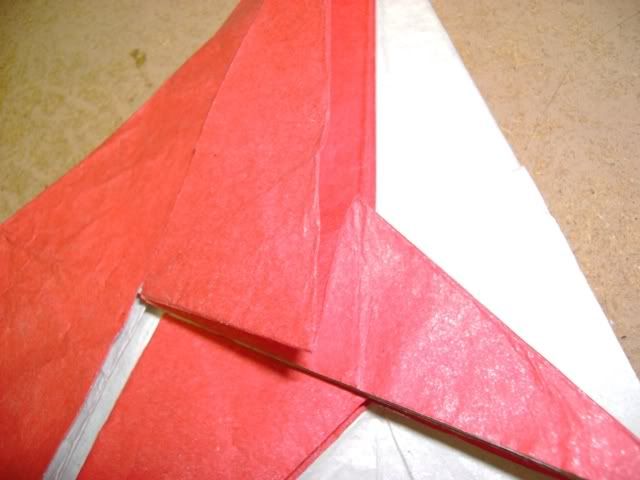
7.reverse fold the bottom flaps. repeat 4-7 behind.
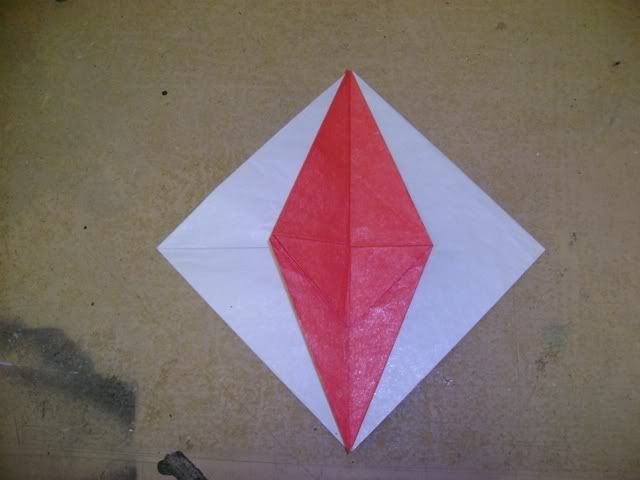
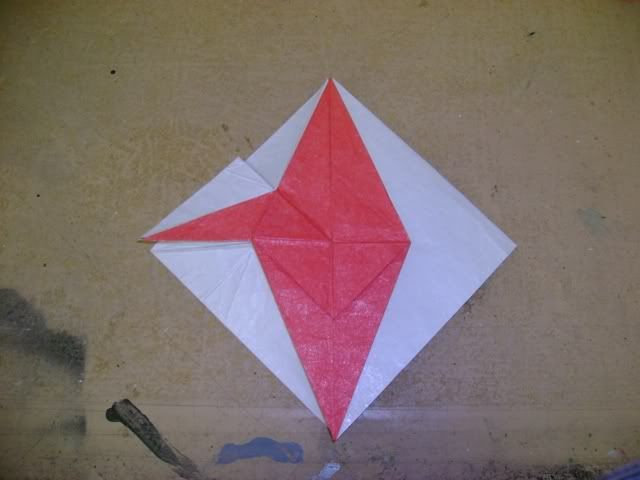
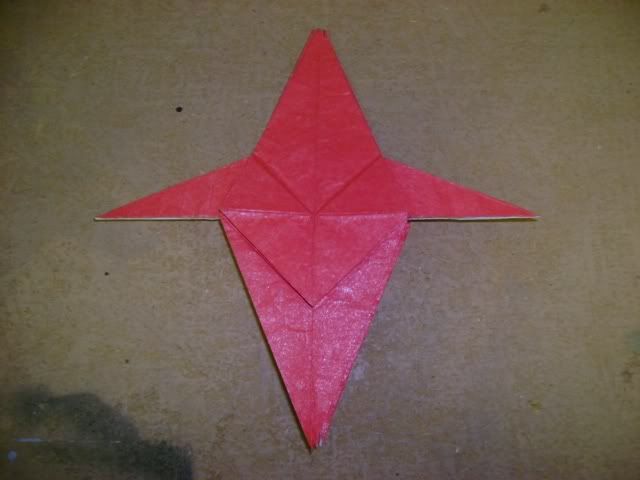
8. fold the small middle flap down.
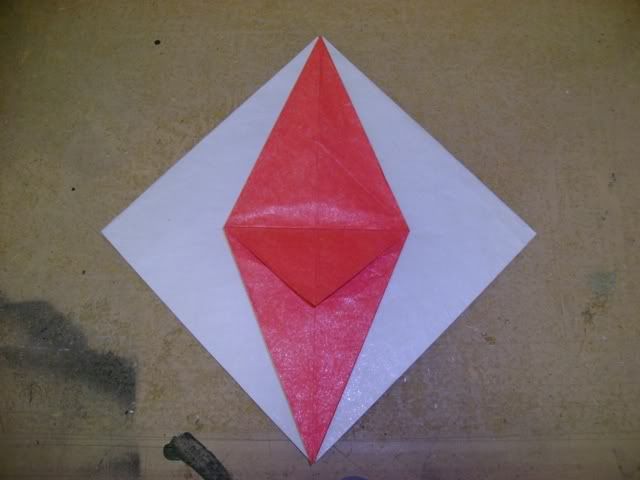
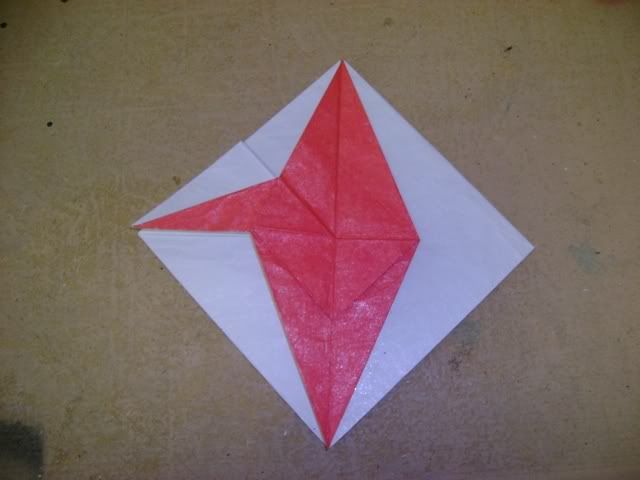
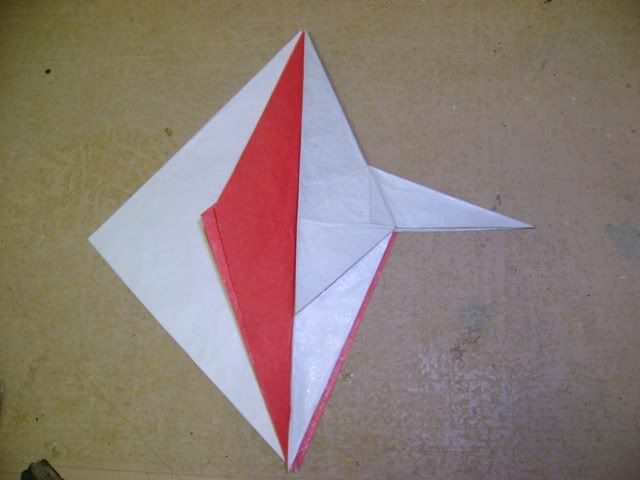
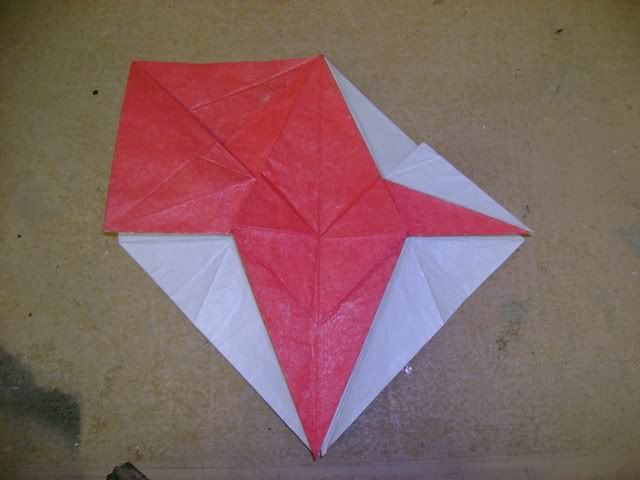
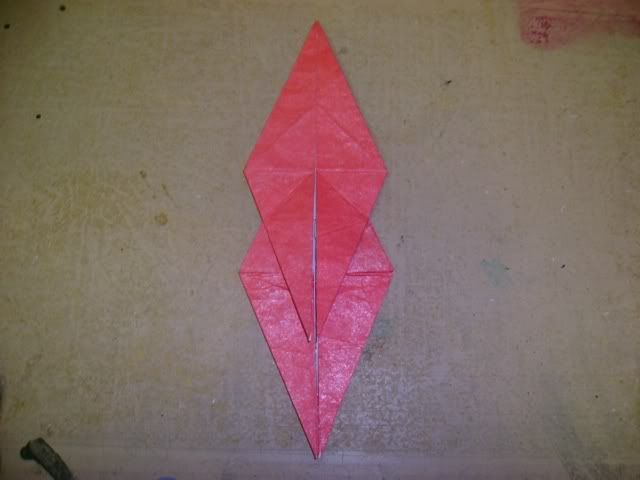
9. fold one flap over to the right.
10. fold one flap up.
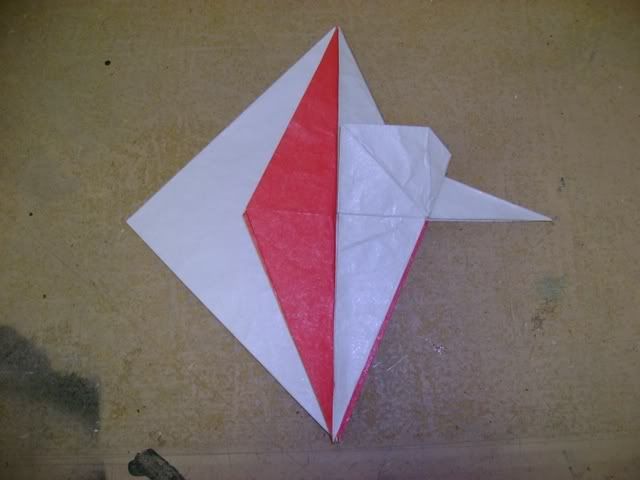
11. fold two flaps back over to the left.
12. reverse fold the top flap to the left. flip over.
13. fold two flaps from the right to the left.
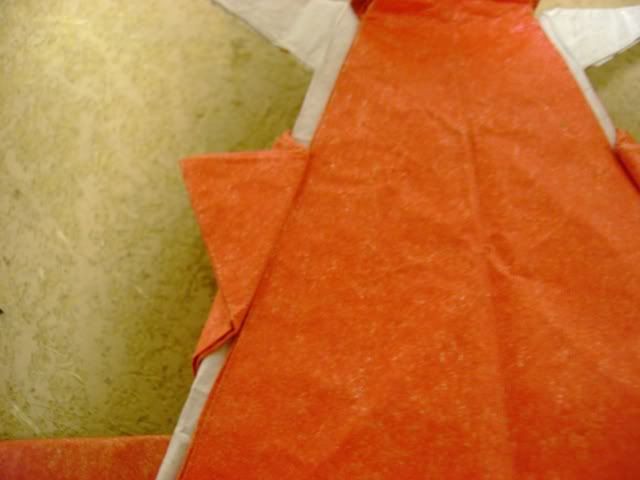
14. fold one flap from the right to the center, simultaneously stretching the top of the flap behind it.
15. reverse fold the bottom of the flap on the right.
16. squash fold the middle flap upwards.
17.unfold back to step 11.
18. repeat on the right.
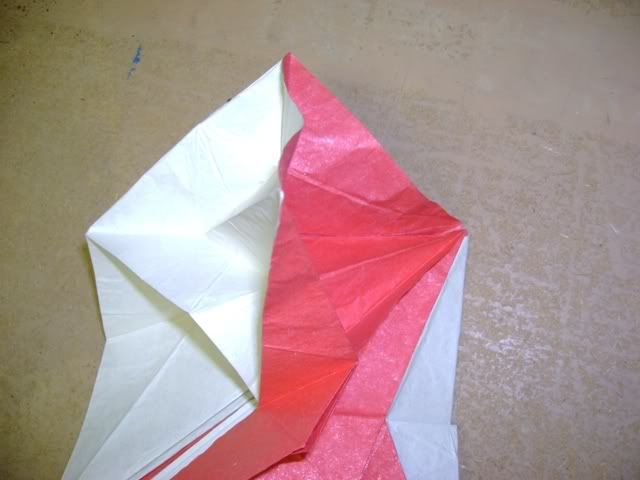
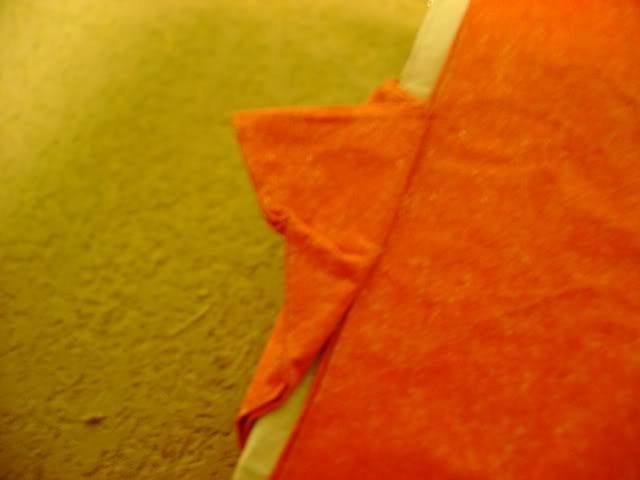
19. partially unwrap one layer from the left.
20. squash fold the large pocket underneath. while doing so, follow the existing creases to collapse the thin red flap.
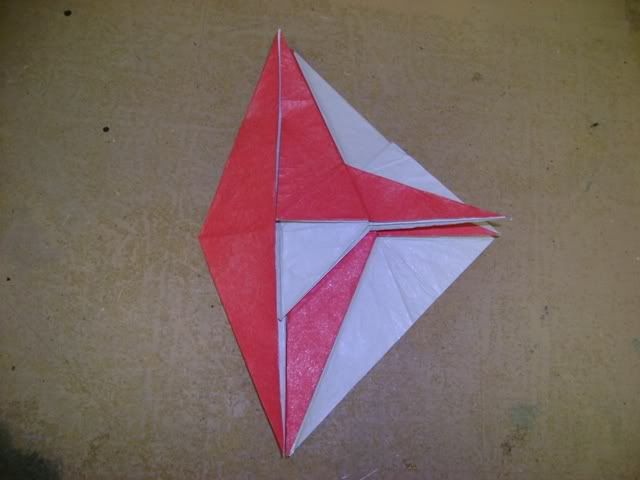
21. unwrap one layer on the left.
22. closed sink the bottom of the flap on the left along existing creases.
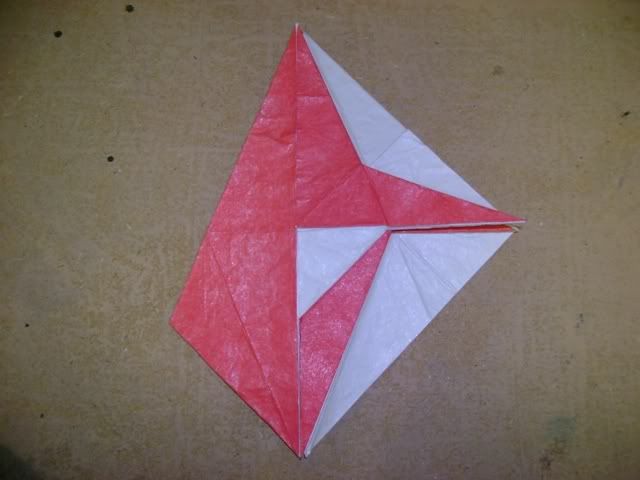
23. sink the central white flap upwards (closed on the left, open on the right) so it appears like a waterbomb base when viewed from above.

24. free some paper near where you just sank the corner upwards.
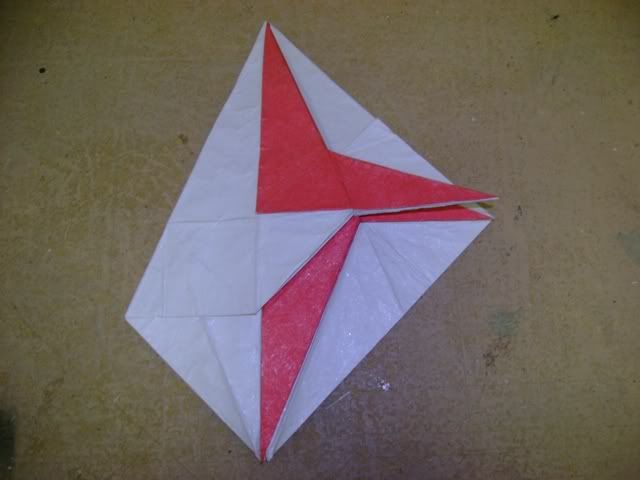
25.fold the entire assembly to the left.
26. repeat 19-15 on the right.
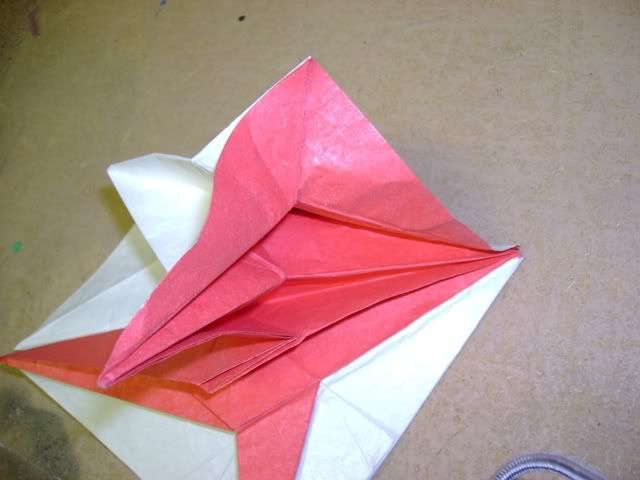
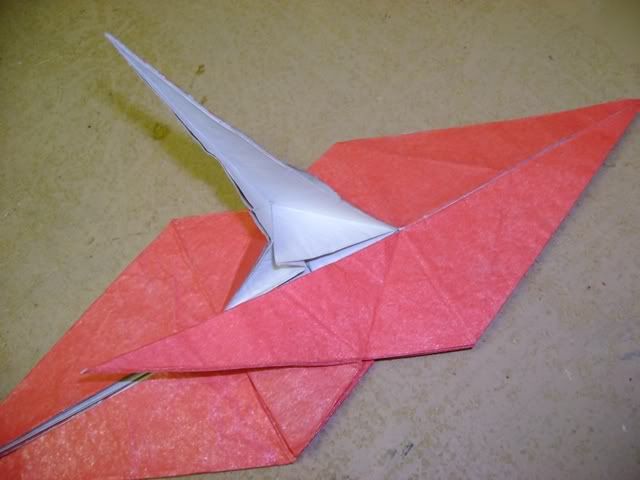
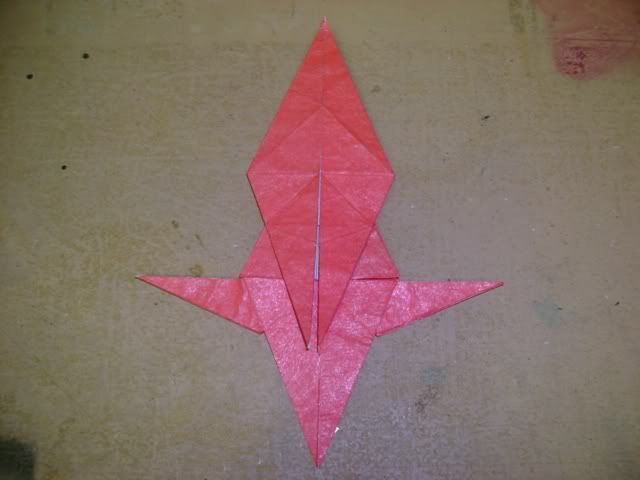
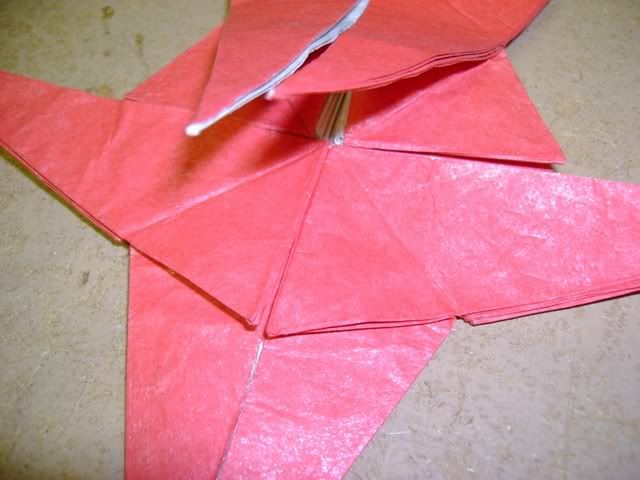
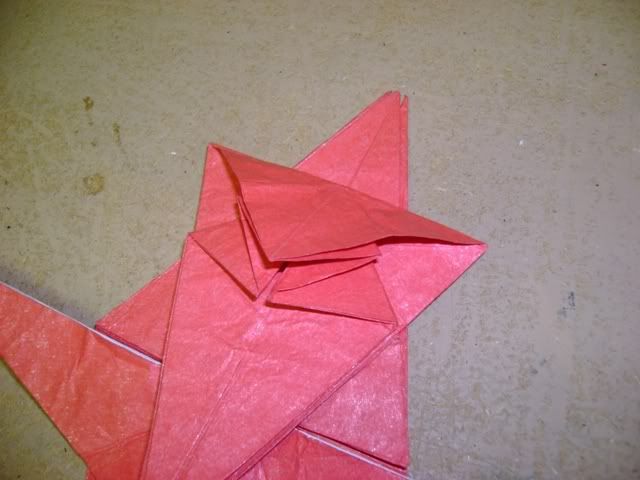
27. stretch the single flap upwards, pulling the outside flaps to the center.
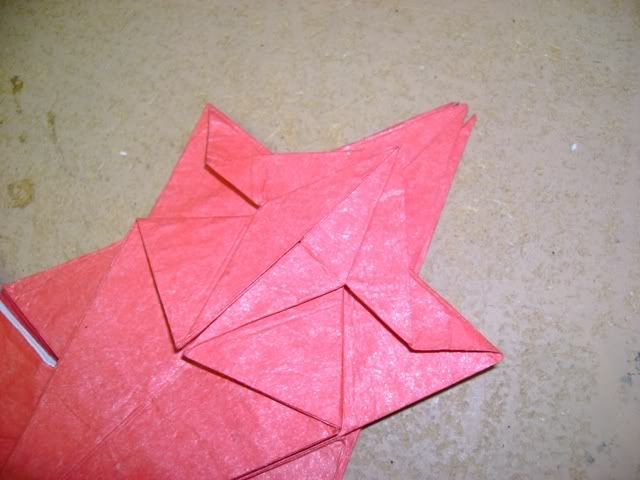
28. free the small flap in the middle of the top flaps and press flat. repeat on the right. flip over.
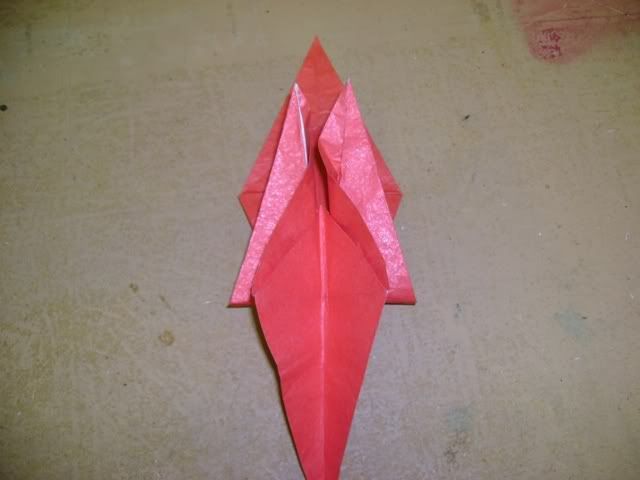
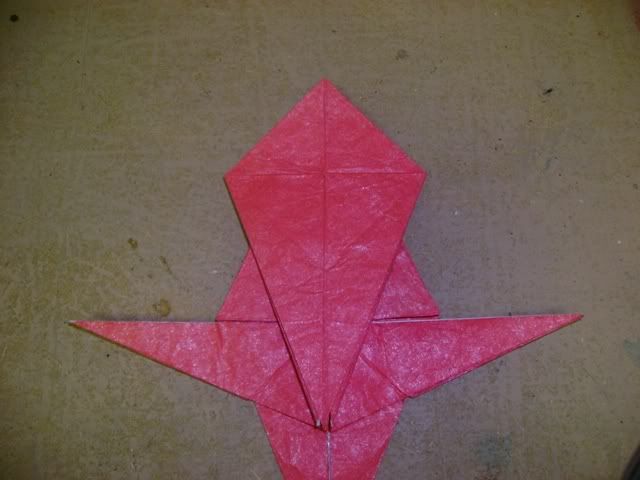
29.reverse fold the two thin bottom flaps upwards, through the point that looks like a waterbomb base. DO NOT PRESS FLAT.
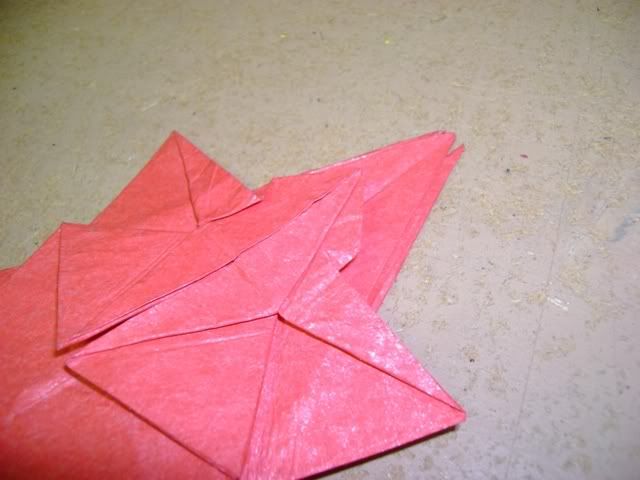
30. fold the bottom flap up.
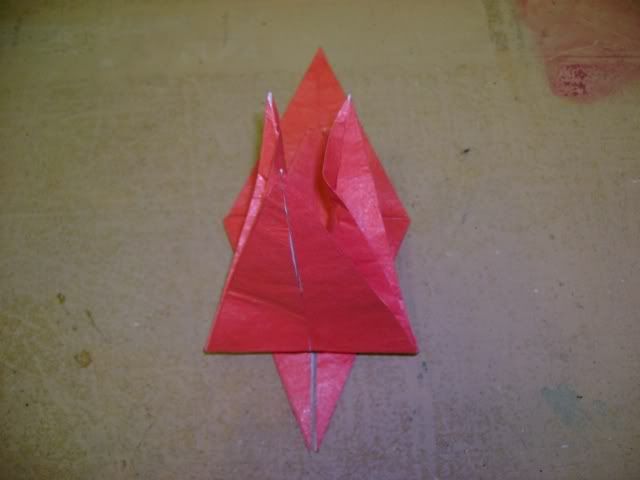
31. fold all three flaps down. flip over.
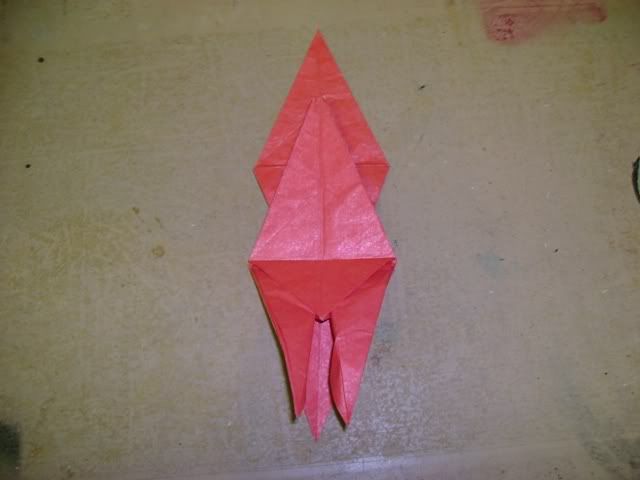
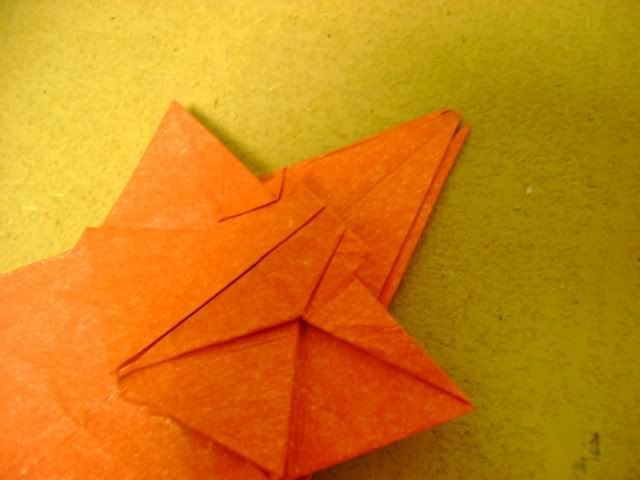
32.reverse fold the two thin flaps to the side. press flat.
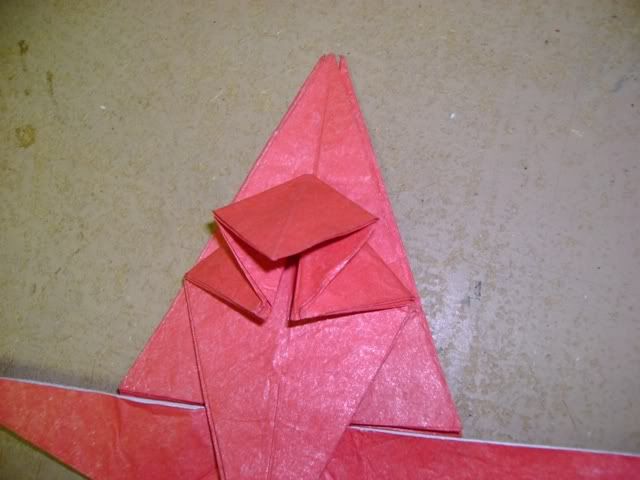
33.fold the two small flaps, above the flaps you just folded down.
34. fold the top flap down.
35. fold the top point as though you were folding a waterbomb base.
36. pull out one layer on either side of the last fold.
37. petal fold the flap upwards.
38. swivel fold the sides part way.
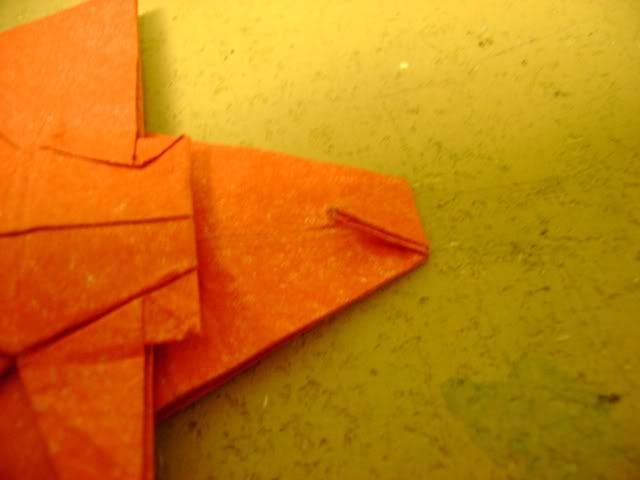
39. fold the tip under where it meets the swivel fold.
40. fold the thick tip about 1/4 of the way to the edge you just made. (mine's a little too far in the picture). it may help to reverse fold the other two points backward. crease and unfold.
41. open sink the tip along the creases you just made.
42. fold the two side points back down, but don't press flat. open the side slightly.
43. wrap one layer behind, to expose the white side of paper. this should be the long side of the flap which forms one of the two points at the top.
44. fold the thin bottom point back up.
45. repeat 43-44 on the left.
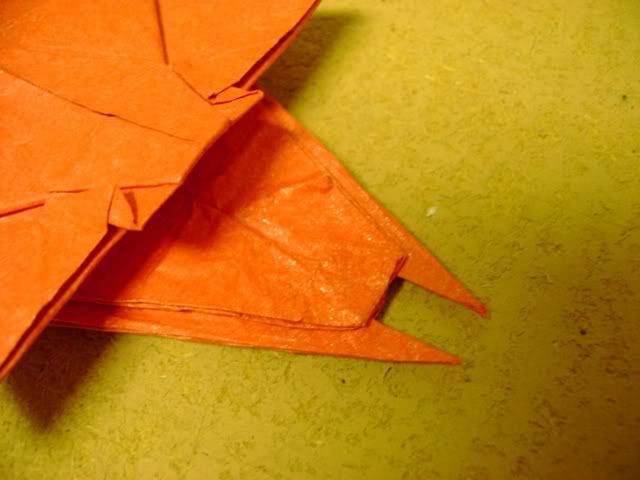
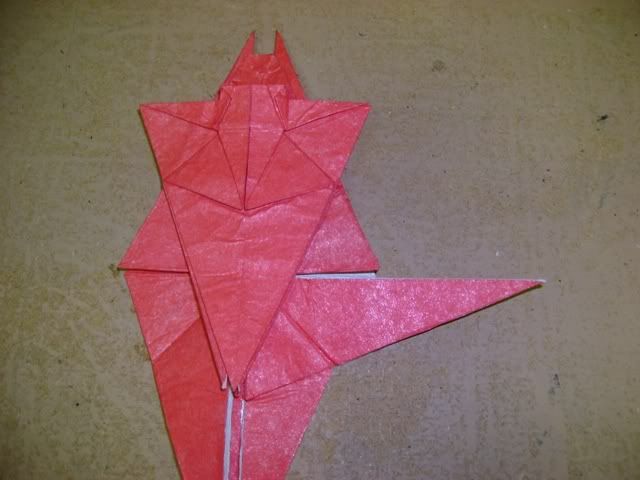
46. open the tip you sank in step 41. You will need to move the two thin points to accomplish this. fold the top and bottom edge back slightly.
47. reverse fold the two thin points to the side.
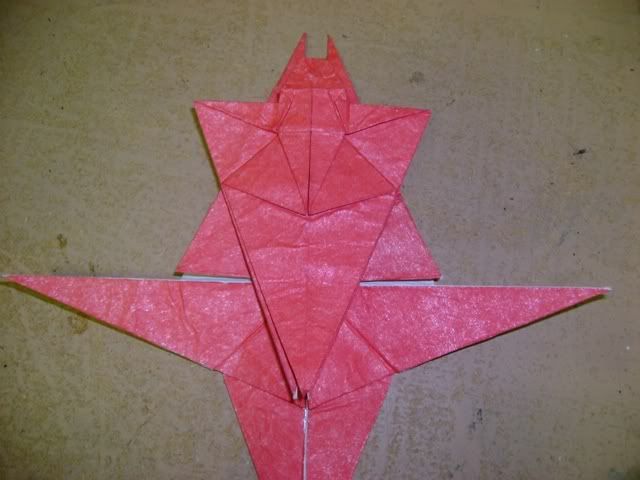
48. tuck the top edge into the pocket behind it. repeat on the other side.
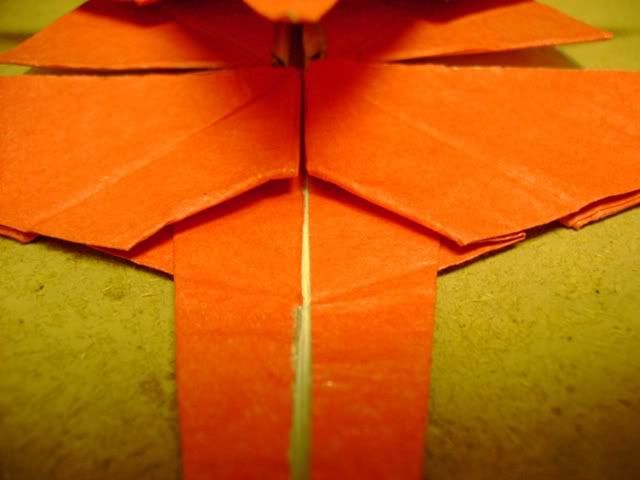
49. reverse fold the two thin points in the center to the outside, as far as they can go. make sure layers are distributed evenly.

50. reverse fold the top edge inward. repeat on the other side.

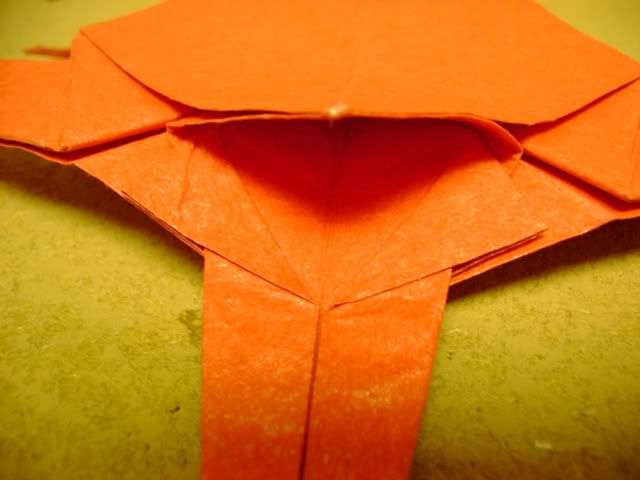
51. pull the white layer of the long side flaps out.
52. tuck the white flap into the bottom most layer of the long flaps.
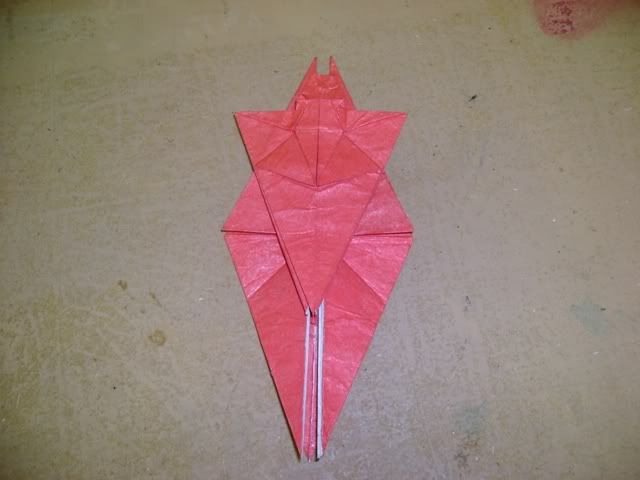
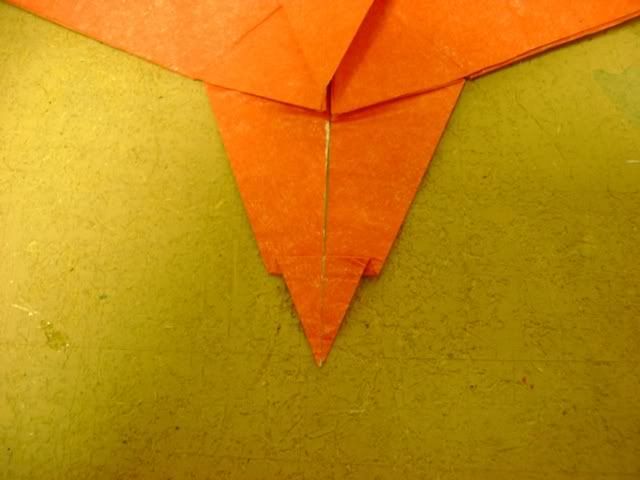
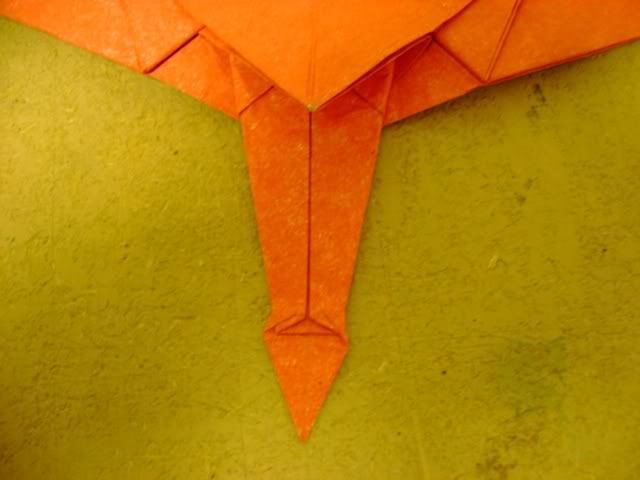
53. pleat the tip of the bottom flap slightly. flip over.
54. fold the edges of the bottom flap towards the center, forming a small gusset at the pleat.
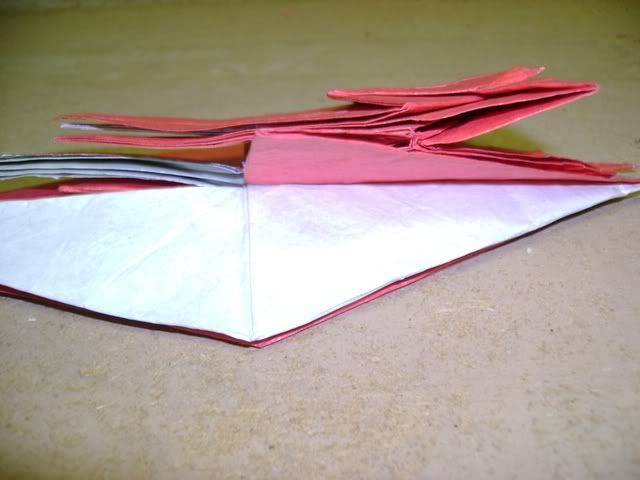
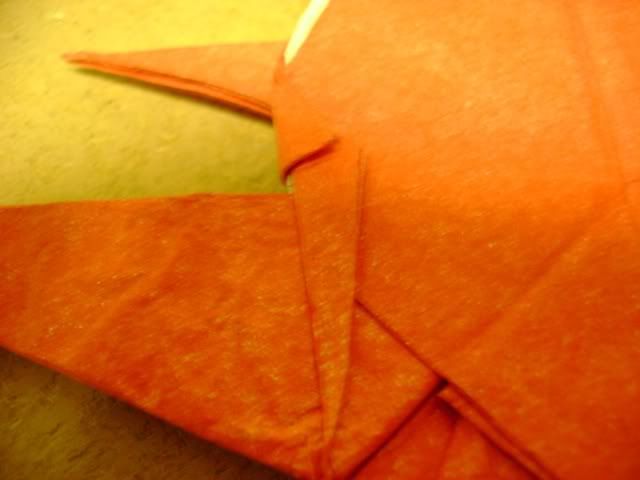
55. swivel fold the paper at the base of the tail. flip over.
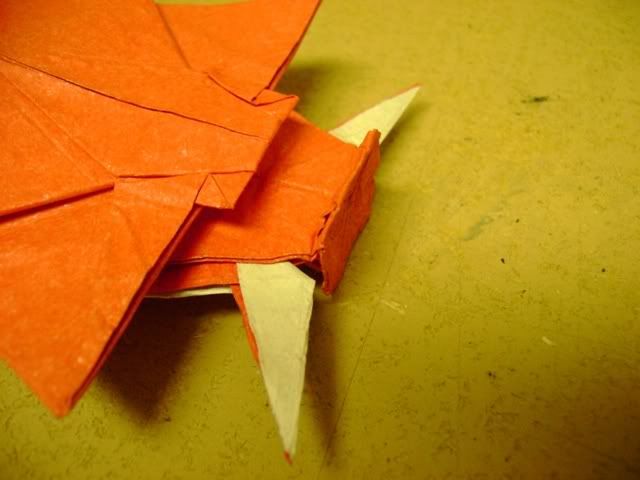
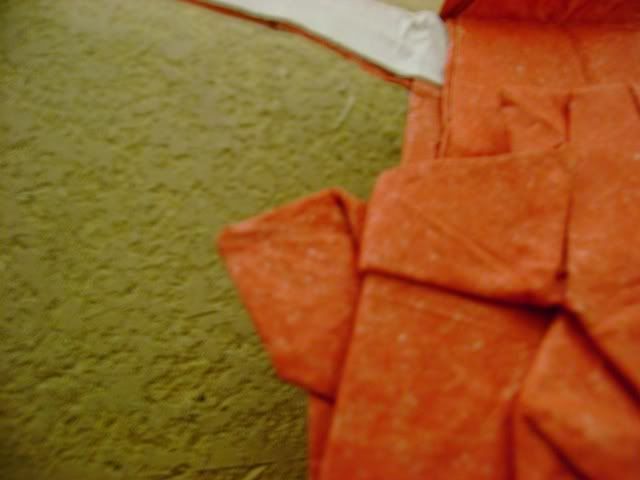
56. tuck the wide corners behind. flip over.
57. fold all edges on the side in, on the same crease, to thin the body. (crease starts at the back of the front leg and ends at the back of the back leg.)
58. pleat the wide point at the top around the edge. repeat on the other side.
59. swivel fold the bottom of the wide flaps.
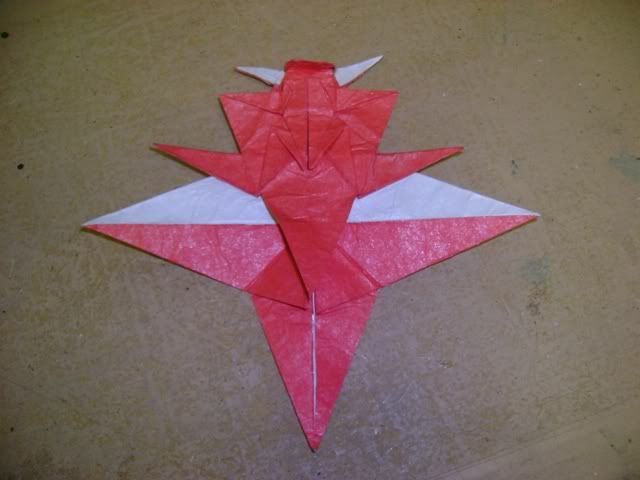
60. flip over. widen the top of the wide point.
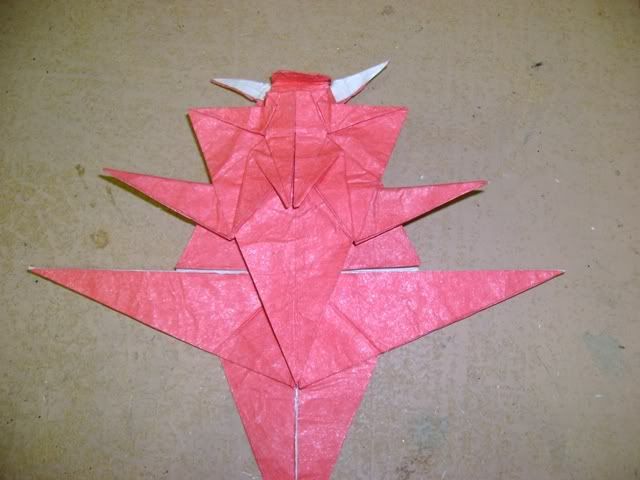
61. round the body. Be careful, the paper is very thick and should be gently curved.
62. crimp the head down and the nose slightly up.
63. simultaneously pull the top layer up and tuck two layers from the front leg into the pocket behind them. The model WILL NOT LIE FLAT. repeat on the other side.
64. crimp and shape the mane.
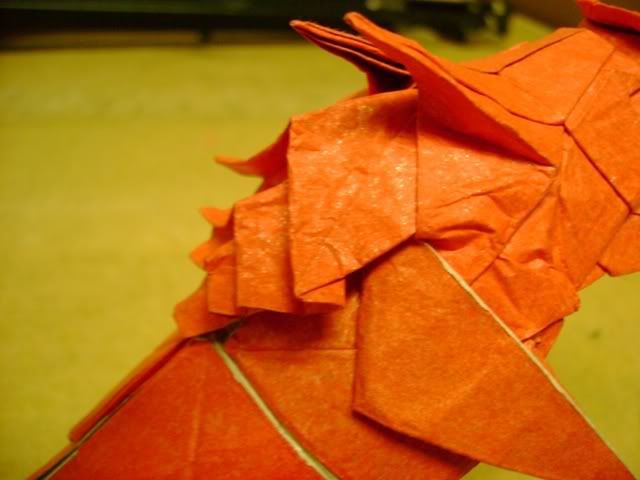
65. reverse fold the legs in and out and shape the hooves.
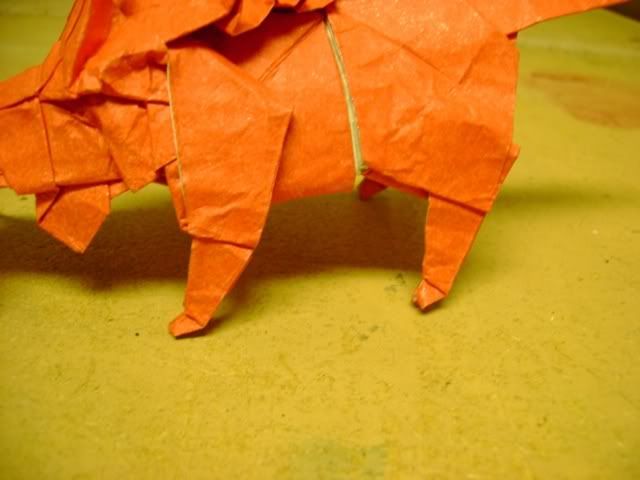
66. shape the rear and tail.

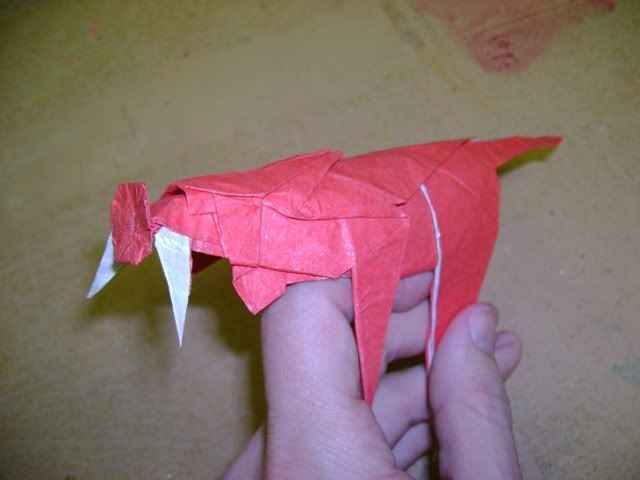
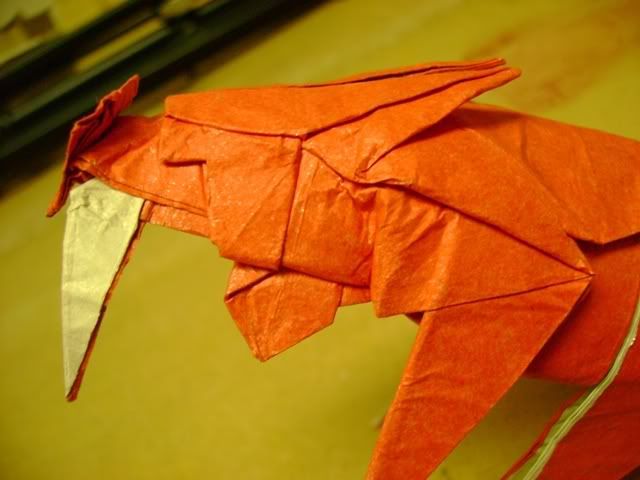
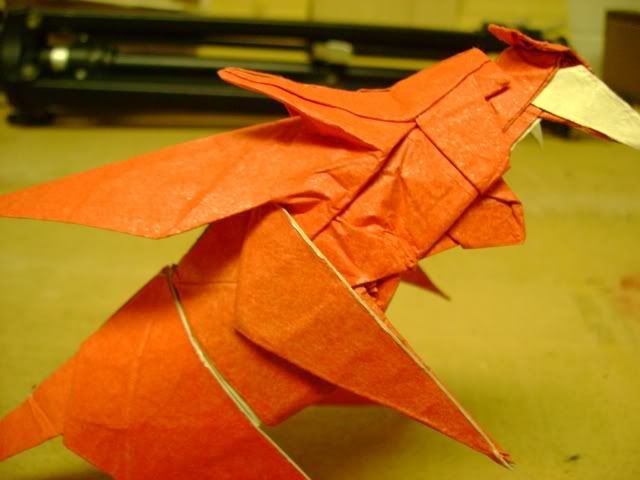
67. open the eyes and ears and curve the tusks.
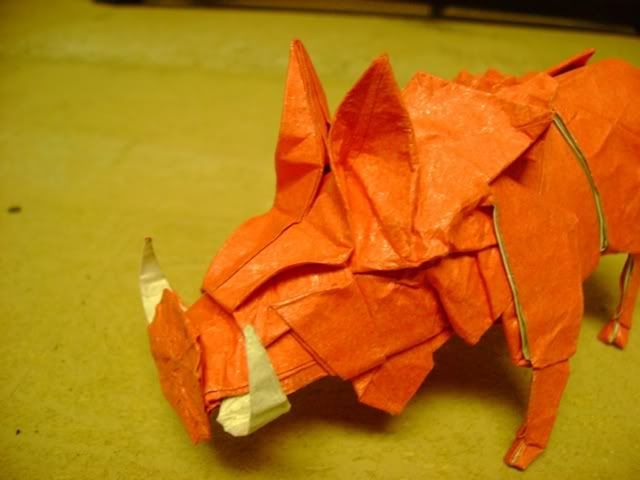
68. finished Wild Boar
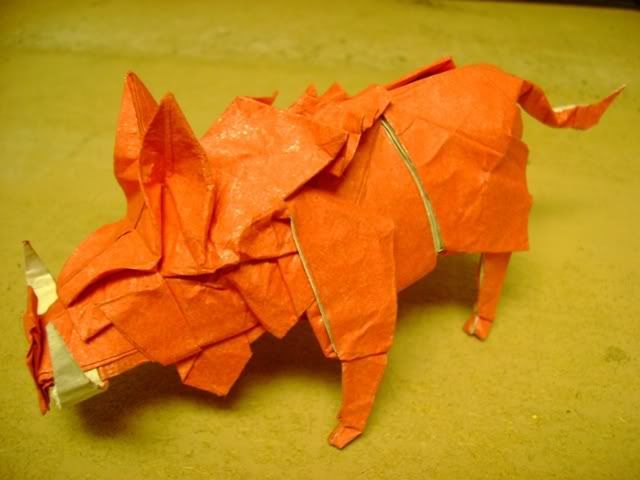
When making this model i suggest using either wetfolding or a foil backed paper, as it requires much shaping that is difficult using regular paper. the final model will end up being approximately 1/3 of the length of the side of paper, so take that into consideration when choosing paper size.
1.precrease the paper along diagonals.
2.fold all corners to the center.
3.perform a preliminary fold.
4. squash fold the flap on the left.
5. petal fold the flap.
6. unwrap one layer.
7.reverse fold the bottom flaps. repeat 4-7 behind.
8. fold the small middle flap down.
9. fold one flap over to the right.
10. fold one flap up.
11. fold two flaps back over to the left.
12. reverse fold the top flap to the left. flip over.
13. fold two flaps from the right to the left.
14. fold one flap from the right to the center, simultaneously stretching the top of the flap behind it.
15. reverse fold the bottom of the flap on the right.
16. squash fold the middle flap upwards.
17.unfold back to step 11.
18. repeat on the right.
19. partially unwrap one layer from the left.
20. squash fold the large pocket underneath. while doing so, follow the existing creases to collapse the thin red flap.
21. unwrap one layer on the left.
22. closed sink the bottom of the flap on the left along existing creases.
23. sink the central white flap upwards (closed on the left, open on the right) so it appears like a waterbomb base when viewed from above.
24. free some paper near where you just sank the corner upwards.
25.fold the entire assembly to the left.
26. repeat 19-15 on the right.
27. stretch the single flap upwards, pulling the outside flaps to the center.
28. free the small flap in the middle of the top flaps and press flat. repeat on the right. flip over.
29.reverse fold the two thin bottom flaps upwards, through the point that looks like a waterbomb base. DO NOT PRESS FLAT.
30. fold the bottom flap up.
31. fold all three flaps down. flip over.
32.reverse fold the two thin flaps to the side. press flat.
33.fold the two small flaps, above the flaps you just folded down.
34. fold the top flap down.
35. fold the top point as though you were folding a waterbomb base.
36. pull out one layer on either side of the last fold.
37. petal fold the flap upwards.
38. swivel fold the sides part way.
39. fold the tip under where it meets the swivel fold.
40. fold the thick tip about 1/4 of the way to the edge you just made. (mine's a little too far in the picture). it may help to reverse fold the other two points backward. crease and unfold.
41. open sink the tip along the creases you just made.
42. fold the two side points back down, but don't press flat. open the side slightly.
43. wrap one layer behind, to expose the white side of paper. this should be the long side of the flap which forms one of the two points at the top.
44. fold the thin bottom point back up.
45. repeat 43-44 on the left.
46. open the tip you sank in step 41. You will need to move the two thin points to accomplish this. fold the top and bottom edge back slightly.
47. reverse fold the two thin points to the side.
48. tuck the top edge into the pocket behind it. repeat on the other side.
49. reverse fold the two thin points in the center to the outside, as far as they can go. make sure layers are distributed evenly.
50. reverse fold the top edge inward. repeat on the other side.
51. pull the white layer of the long side flaps out.
52. tuck the white flap into the bottom most layer of the long flaps.
53. pleat the tip of the bottom flap slightly. flip over.
54. fold the edges of the bottom flap towards the center, forming a small gusset at the pleat.
55. swivel fold the paper at the base of the tail. flip over.
56. tuck the wide corners behind. flip over.
57. fold all edges on the side in, on the same crease, to thin the body. (crease starts at the back of the front leg and ends at the back of the back leg.)
58. pleat the wide point at the top around the edge. repeat on the other side.
59. swivel fold the bottom of the wide flaps.
60. flip over. widen the top of the wide point.
61. round the body. Be careful, the paper is very thick and should be gently curved.
62. crimp the head down and the nose slightly up.
63. simultaneously pull the top layer up and tuck two layers from the front leg into the pocket behind them. The model WILL NOT LIE FLAT. repeat on the other side.
64. crimp and shape the mane.
65. reverse fold the legs in and out and shape the hooves.
66. shape the rear and tail.
67. open the eyes and ears and curve the tusks.
68. finished Wild Boar