wow, pressure isn't probably the best advisor.Maybe if I try and work out some new material.
Diagrams for my Wild Boar
Forum rules
READ: The Origami Forum Rules & Regulations
READ: The Origami Forum Rules & Regulations
-
TheRealChris
- Moderator
- Posts: 1874
- Joined: May 17th, 2003, 1:01 pm
- Location: Germany
-
Ondrej.Cibulka

- Buddha
- Posts: 1055
- Joined: January 9th, 2006, 4:18 pm
- Location: Czech republic
- Contact:
First fold
So, I folded this wild boar.
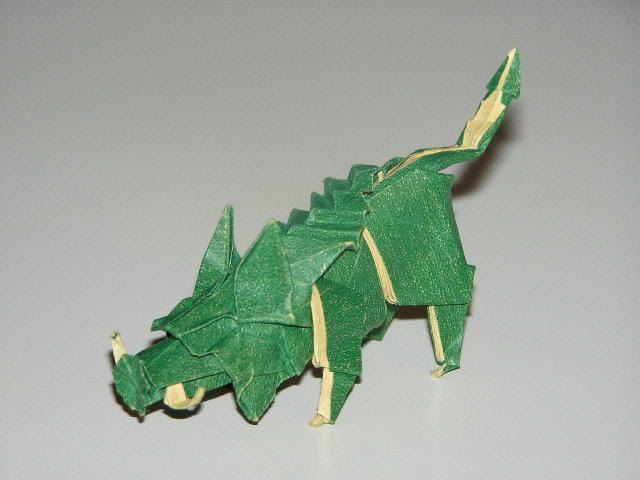
I like this model more and more. The folding way is not easy, but very right. Maybe I will hate this model after several weeks...

I like this model more and more. The folding way is not easy, but very right. Maybe I will hate this model after several weeks...
Ondrej Cibulka Origami, www.origamido.cz

-
Ondrej.Cibulka
- Buddha
- Posts: 1055
- Joined: January 9th, 2006, 4:18 pm
- Location: Czech republic
- Contact:
I would like to more specify one step:
13. fold two flaps from the right to the left.
The central tip of the petal fold is leaved up or folded down in this step?
Thanks.
13. fold two flaps from the right to the left.
The central tip of the petal fold is leaved up or folded down in this step?
Thanks.
Ondrej Cibulka Origami, www.origamido.cz
Very nice, Ondrej. Looks good.  Glad to see that the instructions were not TOO bad.
about step 13, the tip from the petal fold is left up. On the "back", the series of folds makes the petal folded point fold down. The only reason I said to fold it down on the other side is it makes flap allignment easier. It's almost natural for hte point to fold itself down, but I ended up making a step for it anyways.
It seems like you got the hang on it though.
-
rockmanex6
- Senior Member
- Posts: 425
- Joined: April 27th, 2003, 1:28 am
- Location: Rock n robot!
-
Ondrej.Cibulka
- Buddha
- Posts: 1055
- Joined: January 9th, 2006, 4:18 pm
- Location: Czech republic
- Contact:
These steps are shown in the progress and from good angles, in my opinion. It is necessary to play a little bit with paper layers.
The step 24 is not clear, I agree. But if you folded previous steps, this one must be OK.
The step 24 is not clear, I agree. But if you folded previous steps, this one must be OK.
Ondrej Cibulka Origami, www.origamido.cz
-
theorigamist
- Junior Member
- Posts: 56
- Joined: July 18th, 2006, 4:41 am
-
Ondrej.Cibulka
- Buddha
- Posts: 1055
- Joined: January 9th, 2006, 4:18 pm
- Location: Czech republic
- Contact:
Actually, it is not loosening of the paper, but better to say rearranging of layers. I am looking forward to diagramming of this step, I must be very imaginative to describe it right and elegantly.
Ondrej Cibulka Origami, www.origamido.cz
Haha, sorry, about that one. Wow, I feel a bit dumb for that one. I'll edit it, so I don't seem like a moron. 
The free layers step (I think it was 24) ends up being a little like a sink. What you're basically doing is making a flap of paper that will cover up the color changed area beneath it, which you fold later in the model. Otherwise, if you color change the tucks, you will end up with a big white flap on the side of the body (ouch!). I used the term freeing up layers, because, when i folded that step, it seemed more like freeing layers, than sinking an inner corner, but it can be thought of that way too. There are a couple steps in there that I just had trouble describing. That section of steps (in which you perform the sink of the white point, and the freeing of the layers) can be done in a couple of other ways. This was just the way I did them.
Hope I helped clear up some questions.
-
Ondrej.Cibulka
- Buddha
- Posts: 1055
- Joined: January 9th, 2006, 4:18 pm
- Location: Czech republic
- Contact:
This is a minor detail.Cupcake wrote: I found a problem:Thats a preliminary base, not a bird base.zerobar wrote: 3.collapse the sheet into a bird base.
Thank you, zerobar, I have not such courage to call step 24 as a sink but, actually, it is the sink.
Ondrej Cibulka Origami, www.origamido.cz